Spinach, that’s the big, green deal.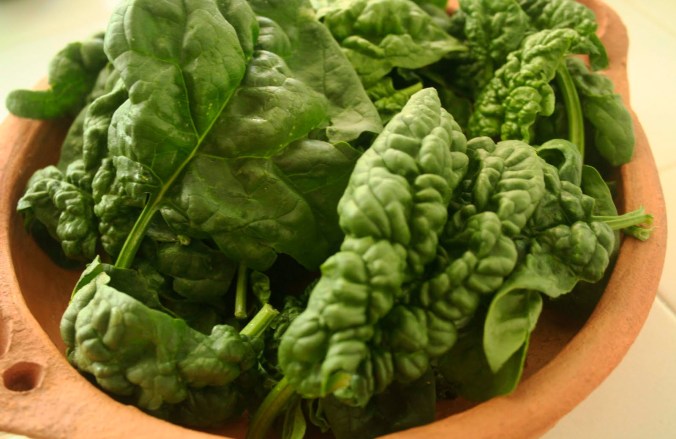 Did you know that curly leaf, or savoy spinach almost went extinct? With the advent of the triple-washed, bagged baby spinach the demand for it among the big produce companies pretty much disappeared. The flavor is less mild, and all those nooks and crannies on the surface of the leaf makes it hard to thoroughly clean a product which already has a somewhat problematic reputation and history concerning sick-making microbes.
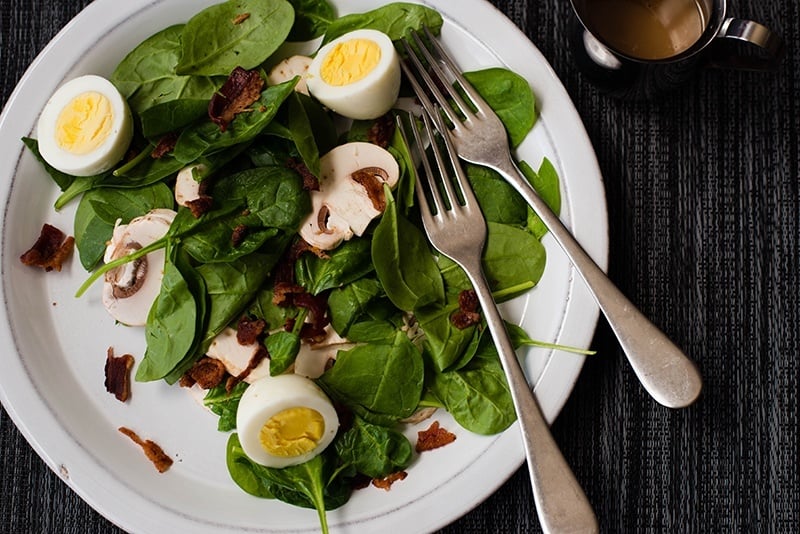 But Petey and I both love a classic spinach salad: spinach, sliced button mushrooms, hard-cooked egg, shaved red onion (Petey’s a hold-the-onion man), crispy bacon shards drizzled with freshly made buttermilk ranch.
So, I almost always have some greens in the fridge. But they go wonky quick, and when most leafy greens get past their prime, there isn’t much to do with them, other than adding them to the compost heap. But spinach is different. When I have spinach that’s too shop-worn for salad, I cook it, either sautéed or creamed. 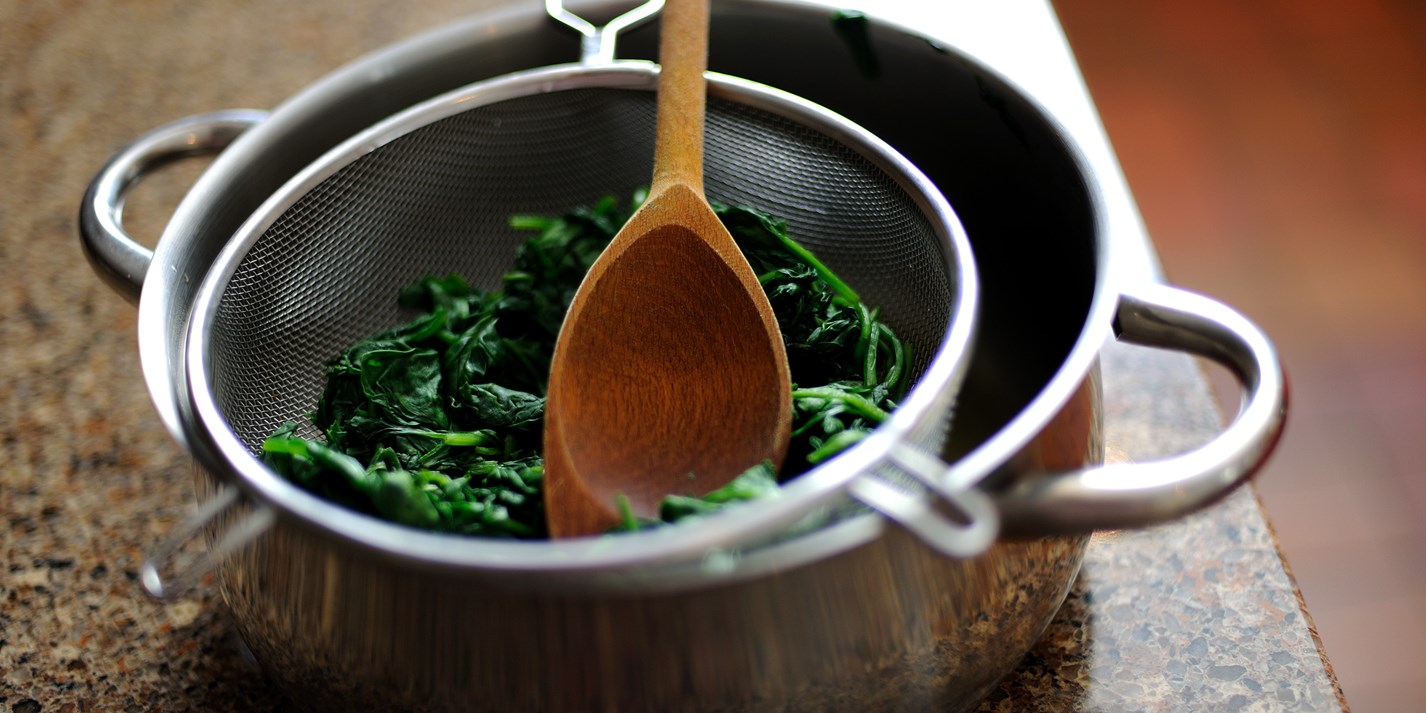 I put it into a large microwave safe bowl, cover it with a paper towel and nuke it until it’s completely wilted; somewhere between 2-4 minutes depending on how much I have. Then I turn it out into a colander to drain and cool.
If I don’t plan on making it right away, I put it in a labeled, dated zip-top bag and freeze it. If you’re not a big salad eater, you could also skip the whole fresh spinach step, and just buy it frozen. 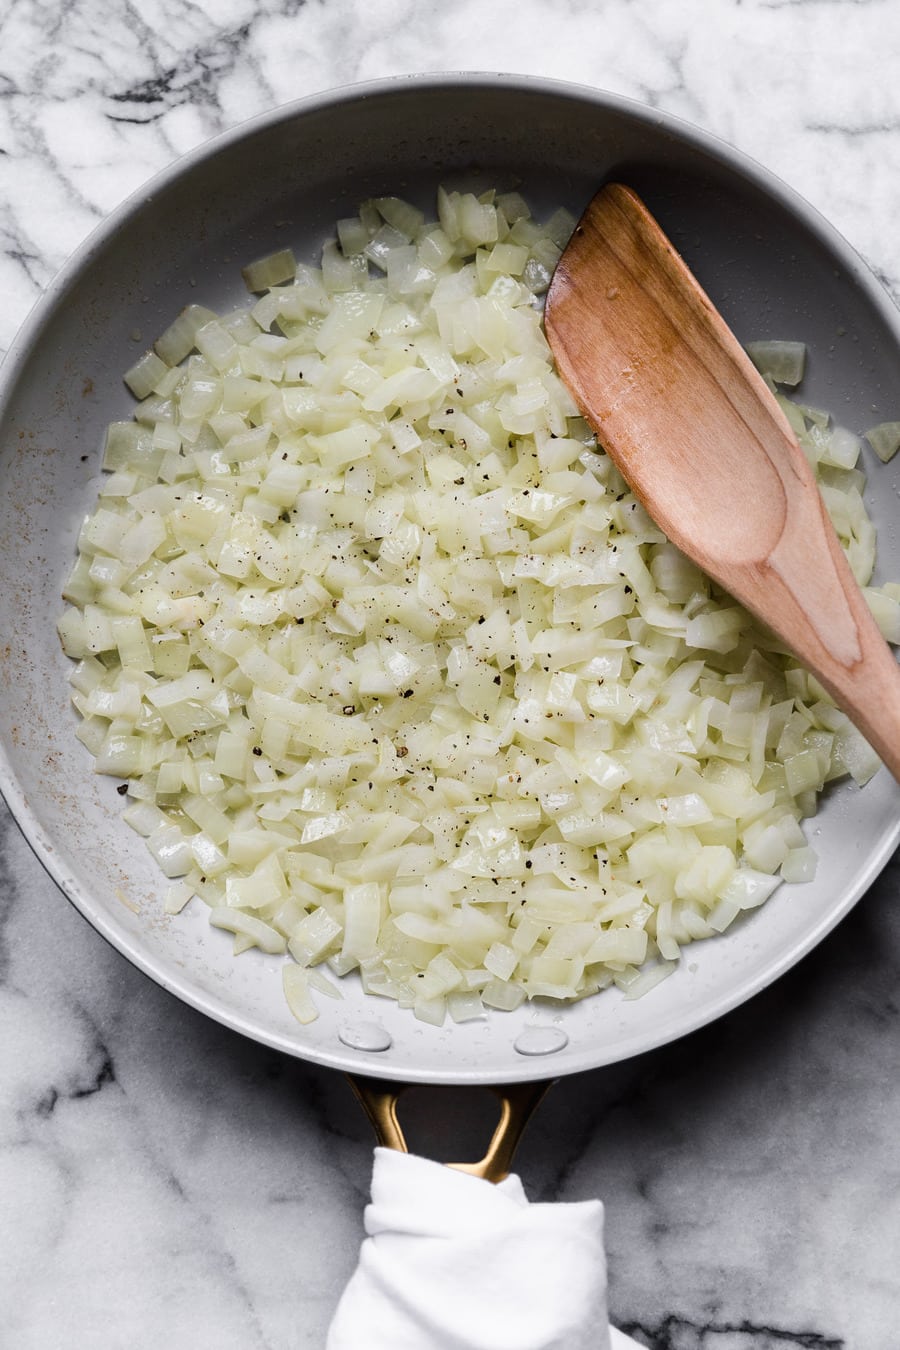 For both sautéed and creamed spinach, you start the same way: onions. Put some butter or oil into a skillet and add chopped onions. Season and cook until they begin to caramelize (the more color on the onions, the sweeter they’ll be, you choose). Then add 2 cups of thawed, wilted spinach that you’ve squeezed most of the water from. Season and add 10-12 gratings of fresh nutmeg. For sautéed, let it cook until it’s mostly dry, and a little browned around the edges. Take off the heat, add the juice of a lemon, check for seasoning, and serve.
 For creamed spinach:
Start like for sautéed, but after adding the spinach, add about 2/3 cup of 2% or skim milk and ¼ cup cream. Season and add nutmeg, then stir in ¼ cup of grated Parmesan cheese (not the stuff in the green can). Let it cook until the spinach is in a nice thick, creamy sauce (about 10 minutes on medium). Take it off the heat and stir in a couple of heaping tablespoons of whipped cream cheese (this will stabilize the sauce). Then stir in the juice of a lemon. Check for seasoning and serve as is, or over a baked russet or sweet potato.
Or. My new favorite thing is to use the creamed spinach in the place of pesto in pasta. Cook the pasta while the spinach is cooking. When the spinach is finished, and the cream cheese and lemon juice are stirred in, transfer the pasta into the spinach pan with a slotted spoon. Don’t drain it, because you’ll then use enough of the pasta water to thin out the spinach, and starch in the water makes the sauce silky and it coats the pasta perfectly. Then top with more parm.
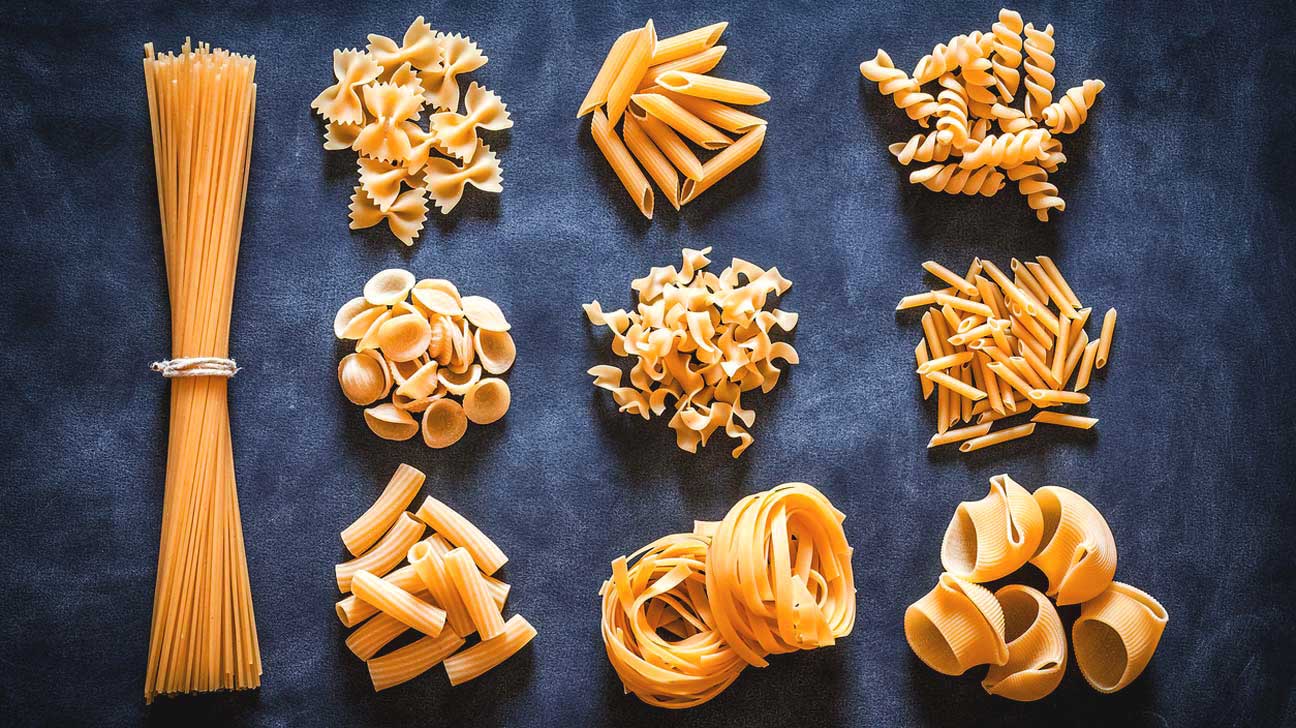 It’s really good, and frankly I’m not sure how this took so long to occur to someone who normally has at least seventy-five varieties of pasta in her kitchen at all times.
Next week I’ll tell you what I got up to tonight with a box of Costco mushrooms and a kitchen full of pasta. Thanks for your time.

 But, this meant there was one parent who could be called to the base in an emergency with no idea when he would return home. Because of this, my mother was a stay-at-home mom.
/easy-chocolate-oatmeal-no-bake-cookies-3058522-hero-01-5c19116e46e0fb000129552f.jpg) Simple, cheap, tasty things from stuff we usually had in the house, like bread pudding, popsicles from Jell-O, preacher cookies, and cream puffs. One of our favorites was her wacky cake that she topped with fudge frosting.
Simple, cheap, tasty things from stuff we usually had in the house, like bread pudding, popsicles from Jell-O, preacher cookies, and cream puffs. One of our favorites was her wacky cake that she topped with fudge frosting. One awesome thing about my mom: she believes it’s perfectly acceptable to have pie, cake, or even rice crispy treats for breakfast (See? Awesome.). Occasionally Mom would splurge on a specific store-bought treat for weekend breakfast.
 Recently I stumbled upon a vanilla version of my mother’s wacky cake. Adding cinnamon makes it more similar to those orange rolls. Last fall I went to Fearrington Village farmer’s market and met Nathan Simons, who with his wife Audrey, creates silky, flavored nut butters. My favorite is their hazelnut/orange. Which reminds me of those canned orange rolls, but in the very best, most delicious way.
 Find Simons Says Nut Butters at
  1 & 1/2 cups + 3 tablespoons all-purpose flour
 1 & 1/2 cups sugar
 The Kid will tell anybody who asks, Grampa’s a superhero. The Kid’s not far off. If you know someone who served their country in the Coast Guard or another branch, say thanks. Or better yet, give them a piece of this cake.
 Thanks for your time.
 Well, inside of this person (me) is a three-year-old who flat-out hates to wait. Who wants to know when it’ll be over. Who thinks this is stupid and it’s gonna take forever. Who don’t wanna…Who’s done and will now sit and pout and probably cry dramatically.
 My mom used to order one of those honey-glazed, spiral-sliced, straight from central casting holiday hams. They were gorgeous, and delicious.
 They cost about a thousand dollars per pound. And, Jason had an easier time getting his mitts on the golden fleece. The hams must be pre-ordered in advance. The stores are usually at some random strip mall in the middle of nowhere.
  And pickup is its very own circle of hell. I’ve seen the lines. They are so long that while in it, time moves in reverse. Folks at the head of the line check the time by glancing at their phones. In the middle of the line, they rely on sun dials. At the back of the line, time frightens and confuses them, and they entreat the sun to ensure a good harvest.
 That little impatient three-year-old inside me just couldn’t let my mother subject herself to that porky purgatory one more time.
 So, I am now the family pig preparer. Each year I make a different flavored glaze, then crust it with chopped nuts that go, flavor-wise. This year it’s watermelon rind preserves and pistachios.
 &
& But we always have a ton left after the holiday meal. And everybody’s got their favorite ham dish.
 Refrigerate for at least an hour, then serve on bread, or use as a dip for crackers or crostini.
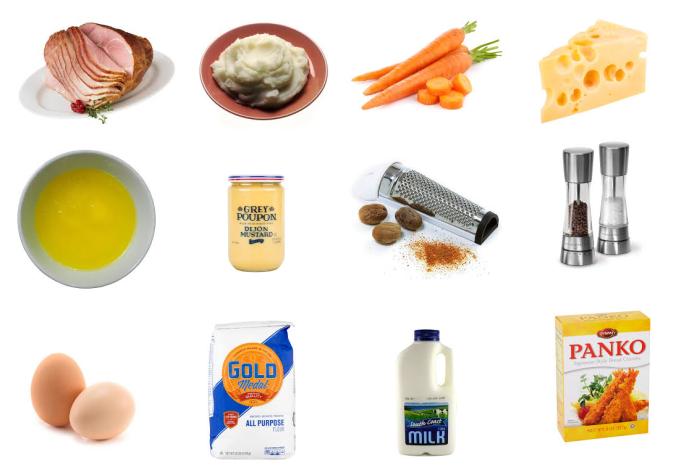
:max_bytes(150000):strip_icc()/Breading-Set-Up-57ede6fb3df78c690f30f09c.jpg) Make three-part dredge. Put seasoned flour in one vessel, beaten eggs and milk in another, and Panko in a third.
Make three-part dredge. Put seasoned flour in one vessel, beaten eggs and milk in another, and Panko in a third. The Kid?
 Thanks for your time.
 Thanks for your time.
 Petey and I have been married for over 33 years. On average I cook six meals a week (that’s 5616 meals). For the first 15 years of marriage though, I probably only cooked four times a week (3120).
 That’s a grand total of 8736 meals (you would not believe how difficult that simple bit of math was for me—and I was using a calculator).
 I was desperate for a new song for my tired, boring veggies to waltz to.
 2 ½ cups frozen vegetable
 You can also switch out the sweet component, and the spices. I have used maple syrup, jam, brown sugar, sorghum, and even reduced root beer. As for spices, nutmeg, Chinese five spice, and pumpkin pie spice all work. You can mix and match to your family’s taste and what’s in your pantry. No need to go buy something special, just work with what you have on hand.
 2 pounds carrots, peeled and cut into similar sized pieces
 Thanks for your time.
 The other half, a wide-eyed, innocent, ‘Happily ever after’ bunch if there ever was one, thinks it’s probably fairy dust.
 But the thing is; these are stealth cookies.
 Then, they sink their teeth in and taste it. Their eyes get real big and their faces light up. “Oh my Gosh! I get it. What’s in these things? They’re the best cookie I’ve ever eaten. What the heck?”
 1½ cups all-purpose flour
 The frosting is really good, and works on anything that needs frosting, and stuff that doesn’t. My dad and I have been known to eat a bowl of it, on nothing more than a spoon.
 Thanks for your time.
 Since Halloween is coming I thought I’d give you, gentle reader, a voyage through one of the most spine-tingling, terrifying places that I know.
 I especially loved going to garage sales and the library sale to snag those little cookbook magazines from the checkout line at the supermarket. The older the issue better, with a special interest in the Pillsbury Bake-Off editions.
 To make for a dramatic, attractive presentation, I make it in a spring form pan. I layer it with flour tortillas which I dredge in a sauce. Between the tortillas I’d put a couple different Mexican ingredients.
 After experimenting, I settled on filling. The center layer was 2 cups shredded rotisserie chicken mixed with ½ cup of store-bought queso, like what you eat with chips. The layers above and below the meat would be my deluxe homemade cantina-style rice.
 Boo!
Boo! This week it’s herbs, and cooler flavors.
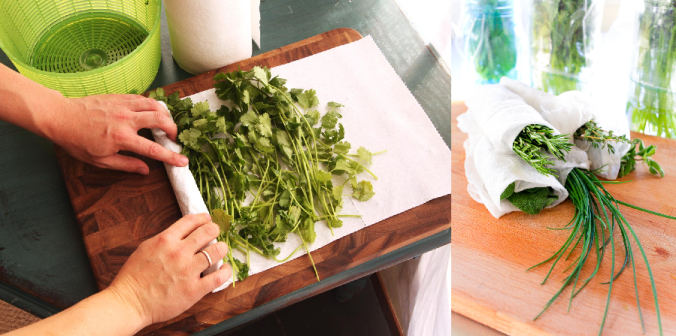
 You second choice is easier but you don’t get quite as long a shelf life. Trim the ends off the herbs. Fill a tall glass with water, and place in the trimmed herbs like flowers in a vase. Change water daily.
 Basil is a soft leafy herb with that distinctive, fennel/licorice flavor. It’s a staple in Italian foods.
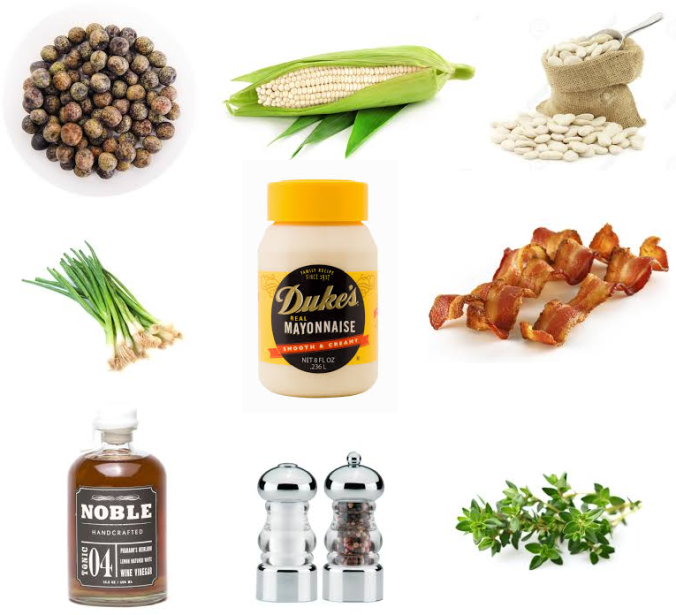
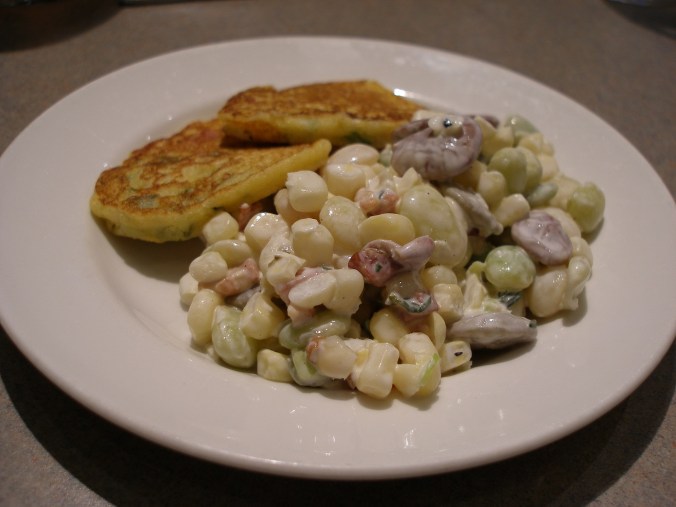
 Quite a few years ago my mom developed an allergy to eggs, and from then on, left them out of the potato salad.
 Serves 4-6.
 Thanks for your time.

 To dice okra, treat it just like an onion. Leave on stem, cut width and length-wise. Then slice it into a dice.