Lasagna and marriage

vintage basket, Flower Girl Basket Wedding Basket Vintage - Array[1], home storage organization

So, technically, I wasn’t the flower girl.

Friends and family didn’t ask for exposure through my writing, so they get pseudonyms.  Petey is not on my spouse’s birth certificate; it’s a nickname.  Sometimes it’s something I’ve bestowed, and sometimes I ask the person to pick out their own alias.

But this week there’ll be no pen names.

Until very recently, the right to marry was not universal, and still isn’t universally accepted.  Even now a person’s livelihood and very life can be at risk just by the simple act of refusing to hide one’s authentic self.  To reject shame and embrace pride, to deny secrecy and live openly with dignity, my friends requested that I dispose of fake names for them.

Last weekend we celebrated the marriage of one of my oldest and dearest friends, Maxie Figgs, and his partner of eleven years, Mark Hipps.

mark maxie dogs

Mark, Maxie, and thier four-legged children.

I was honored and touched to be asked to stand with them at the wedding.  The guys were creating their own traditions, so there were no conventional best men or matrons of honor.  I, along with Maxie’s niece and nephew stood at his side while Mark was attended by his best friend and two sisters.

Tracy debbie selfie

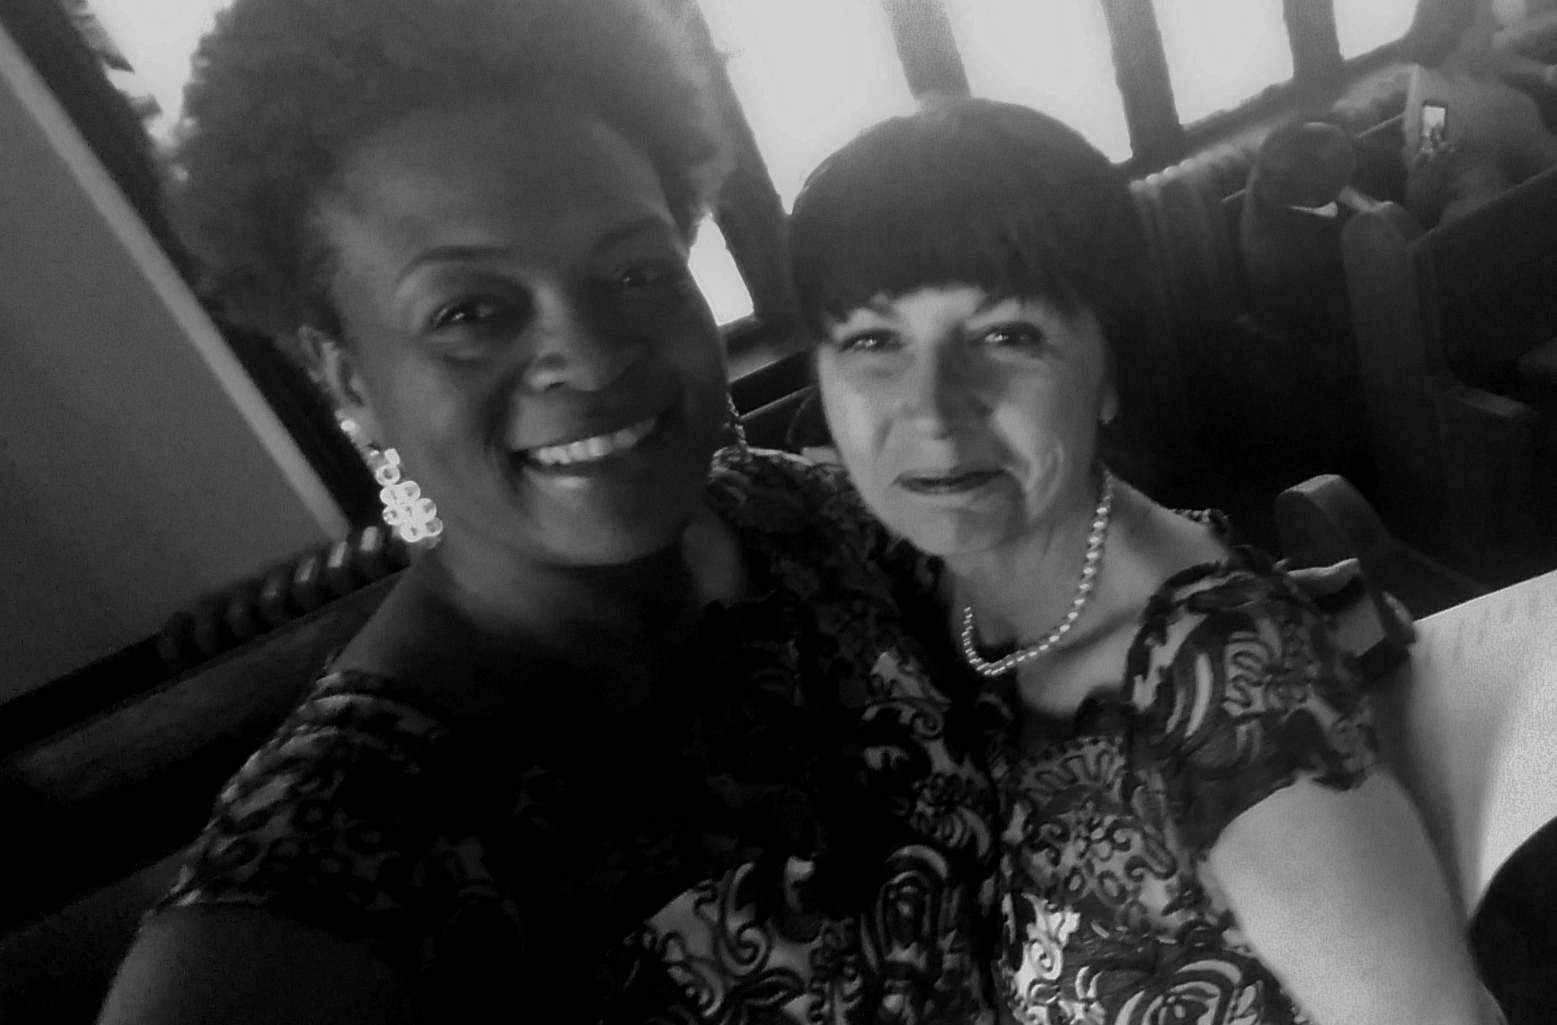
A new friend–Maxie’s niece, Tracy. Notice the matching dresses. She looked way better in hers. I felt like a six-year-old playing dress-up.

Each groom had a little flower girl, and one of my responsibilities was wrangler to Lilly, Maxie’s cherub.  I was to make sure she made it to the altar with no melt-downs or catastrophes.

So finally, after dreaming of it practically my whole life, I got to be a sort-of-flower-girl.

The Saturday nuptials were both beautiful and joyous, and the reception was held at The Pitt (321 W Geer St).  The staff is friendly and efficient and the food delicious; along with traditional tasty treats like barbecue and biscuits they have crazy but inspired items like fried pimento cheese balls (I stopped at three, but could’ve polished off at least ten more).

The rehearsal and corresponding dinner were Friday evening.  It was self-catered in the church’s fellowship hall.  I made vanilla bean and Duke-blue velvet mini-cupcakes for dessert and Mark cooked the rest.  Along with salad, chicken casseroles, and strangely seductive garlic toast, he made his famous lasagna which I’d enjoyed before; at their engagement party.

Mark’s celebration lasagna

Mark doesn’t cook with salt; feel free to use it, but taste as you go—this dish is spicy and flavorful.  Serves 20-24

Meat:

2 pounds hamburger

1 pound Italian sausage

Dried herbs:

Oregano

Basil

Garlic powder

Red pepper flake

Brown meat and season with herbs to tatste.  Drain off fat after it’s cooled some.

Veggies:

1 onion, chopped

2/3 green bell pepper, chopped

Sautee in butter and olive oil.  Season with garlic powder.

1/2 -1 pound mushrooms, sliced

Sautee separately in butter and olive oil with garlic powder.

Sauce:

1-28 ounce can tomato puree

2-29 ounce cans tomato sauce

4-14.5 ounce cans diced tomatoes (2 Italian style, 2 plain)

1-12 ounce can tomato paste

Pour everything into large pot along with meat, onions, pepper and mushrooms.  Prepare ricotta while simmering sauce on very low heat.  Stir occasionally so it doesn’t scorch.
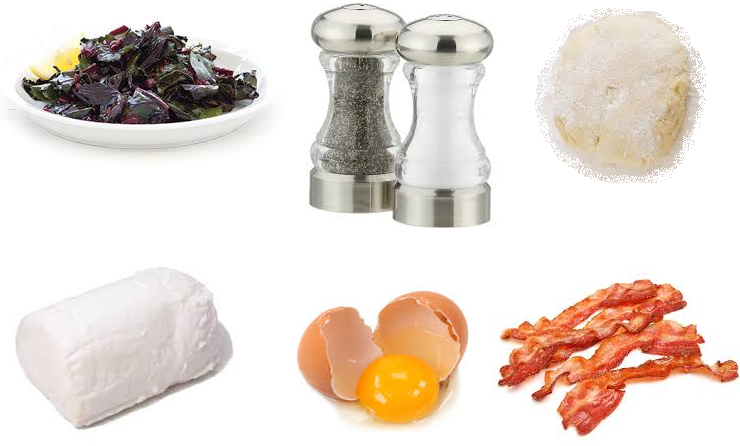
Faux Ricotta

4-24 ounce tubs low-fat cottage cheese

10 eggs

6-8 ounces shredded Parmesan

2/3 bunch parsley, very finely chopped

Cayenne (optional)

black pepper to taste

Mix cottage cheese and eggs.  Stir in Parmesan. 


Assembly:

3-12 ounce boxes lasagna (any kind—don’t cook before assembling)

2-24 ounce bags shredded Mozzarella

One large roasting pan, or 2 9X13’s.

Loosely layer sauce, pasta, more sauce, ricotta mix, then mozzarella.  Don’t use too much of anything (especially sauce) while building, as it will be too wet, bubble over, make a mess, and waste food.  Repeat until dish is filled, ending with mozzarella.

Cooking:

Bake at 375 for 55 minutes or until it’s cooked through, slightly browned and internal temp is 165 degrees. 

Let sit loosely covered at room temp 15-30 minutes before serving.

In keeping with the “no-tradition” tradition, the wedding party was asked to give a toast if we wanted.  I went back and forth and finally on the morning of the ceremony, decided to do it.  I read a very lovely passage from something I was reading about finding the other half of one’s soul.

It was a Star Trek: The Next Generation book.

Best wishes to Mr. and Mr. Hipps-Figgs.

the big dance

Thanks for your time.


Well, that just beets all

Petey, The Kid, nor I are picky eaters.  So, even if a food doesn’t appeal to one of us, the other two usually enjoy it.

2012-12-10_18-34-24_659

The Kid made all the components for this tasty looking Reuben.

The Kid and I love corned beef and the Reubens we make with it.  Not Petey, but we love canned corned beef hash, which The Kid despises.  My spouse and child are dedicated pescitarians, while my finned and gilled tastes run to tuna sandwiches and old-school rectangular fish sticks—which Petey enjoys, but The Kid cannot abide.  Avocados and artichokes?  The Kid and I yes; Petey no.

And on, and on.

Except.

Nobody in this family; not even our giant dog Riker, who deeply relishes finding and snacking on rabbit poop, likes beets.  Nobody but me.

I like them roasted, pickled, Harvard style, even from a can.  I offer them to my family every time, but if they’re too unenlightened or scared to partake, that’s their problem.  I will happily dispatch all the beets all by myself.

Yesterday I brought home some beets.  The dark green tops and hot pink stems beckoned to me and suggested that instead of tossing them into my compost as usual, I should experiment.

So I did…and oh how yummy.

Sautéed beet greens

beet greens

Beet tops from 12-14 beets

1 tablespoon garlic oil

1 onion, chopped

¼ teaspoon freshly grated nutmeg (always use nutmeg in dark greens, and always use freshly grated nutmeg)

Juice of half a lemon

Salt & Pepper

Chop greens and stems into 1 ½ inch pieces.  Put into colander and wash thoroughly; they can get very sandy.  Heat garlic oil in large heavy pot with a lid. 

Toss in all the greens, stems, and onions, season with about 1 teaspoon salt and ½ teaspoon pepper.  Stir to coat everything, drop heat to medium-low, and cover.  Cook for 8-10 minutes, or until the liquid has released from the veg.

Uncover and cook, stirring frequently until the liquid’s cooked in, and everything’s starting to caramelize.  Stir in lemon juice, check for seasoning, and re-season if necessary.  Serves 4. 

There’s some unusual chemical component I think, in them.  The greens and stems produce a very light unctuous sauce, almost like a cornstarch slurry was used.  It’s very pleasing to the palate.

You could eat them just like this.  They’d also be a revelation spooned over grits.  Or add some Parmesan cheese and cream sauce, and then have pastel-hued creamed greens.

But.

I came up with another idea.  What about beet green hand pies?

Pink & green hand pies

beet hand pies

1 batch sautéed beet greens, cooled

4 ounces goat cheese

8 pieces bacon, cooked crisp and crumbled

Pie crust—either homemade, or store-bought, cut into four 6 inch rounds, about ¼ inch thick.

Egg wash

Salt and pepper

Place cooled beet greens into a large bowl.  Break up pieces of goat cheese, and fold into greens.  Set out dough rounds on cookie sheet.  Place ½ to 2/3 cup of filling into center of dough.  Crumble bacon onto top.  Fold dough over to form half-moon, and seal edges with a little water and crimp with a fork.  Brush with egg, sprinkle with salt and pepper, and cut a couple of small slits on top.

Bake at 375 for 35-45 minutes, or pies are golden and crispy.  These can also be deep-fried in 350 degree oil until golden (don’t cut slits if frying).  Serve hot or cold.

You can assemble these but not bake, and freeze them for later.  Or, make them much smaller, and serve them at a party.

Thanks for your time.

All’s Fair

I honestly didn’t think it was possible for the state fair to get any better.

Boy was I wrong.

You may have seen Lisa Prince on TV.  She hosts PBS’s show, Flavor NC.  She also appears on WRAL’s Friday noon news alongside Brian Shrader, cooking recipes from viewers.  Recently, she asked me to be a food judge at the fair this year.

I hesitated for approximately .0025 seconds before I said, “Heck yeah!”

On opening day with an empty stomach, and excitement in my heart, I showed up for the North Carolina Peanut Growers Association PB&J contest.  There were 27 entrants.

When I heard this, I almost fell off my chair; with all that food, I was hoping they’d have a rescue squad, or at least a wheel barrow standing by.  But luckily, they divided the judges into two teams.  We each sampled half of the batches, then exchanged our top picks, to determine first, second, third place, and honorable mention.

The grand winner was the only savory dish with which we were presented.  In a neat twist, the winning cook was from Durham; Gretchen Van De Carr.  Her PB & J wontons were terrific; savory, spicy, salty, and what we thought expertly fried snacks were actually baked.  Pick up a jar of Sarah Foster’s pepper jelly, and make a batch.  They’re perfect for game day or party munchies.

*A side note: my fellow judge, Buck, from Lumpy’s Ice Cream in Wake Forest and I decided they would extra yummy served with a dipping sauce of honey and soy.  When I mentioned it to Gretchen and her escort, they both agreed.

PB&J Wontons 

pbj wontons

1 cup unsalted, unsweetened peanut butter

1 cup pepper jelly (as hot as you like it!!!) 

24-36 wonton wrappers

3 tbsp. olive oil

Course sea salt and cracked pepper to taste.

Pre heat oven to 375 degrees.

Line a large baking sheet with parchment paper.

Lay out wonton wrappers on parchment paper leaving a little room to work between each.

Place 1/2 – 1 teaspoon of peanut butter in the center of each wonton.

Place 1/2 – 1 teaspoon of pepper jelly on top of the peanut butter in the center of each wonton.

Get a small bowl of water.

Dip your fingers in the water and run them along all edges of a wrapper.  Then fold that wrapper into a triangle and press edges together.  I like to use a fork to help press edges (optional, but pretty).

Repeat with the rest of the wonton wrappers.

Brush the tops of the triangles with olive oil.  Sprinkle wontons with course sea salt and fresh cracked pepper.

Bake for 17 – 20 minutes.  LET COOL for at least 5 minutes.  Enjoy warm or cold.

Any leftovers store nicely in a zip-lock for up to a week!

Congrats Gretchen, and thanks for a fun new recipe.

After the judging was finished, Petey and I wandered around the fairgrounds to see the sights and stuff our gobs some more.  In the Education building, I made a very happy discovery.

D’Vines was there.  They make my favorite sassafras jelly, and at the AgFest each year has a booth which sells wine and cups of their insanely delicious grape slushies.  Unfortunately they only sell sassafras jelly at the Raleigh farmers market, but they had plenty of that purple frozen treat.

When we were at the Agfest last May, Anthony Anderson, star of the new show Black-ish, was there filming a segment for his other show on Food Network about food served at local celebrations.  One of the purveyors he spoke with was Grannies, from Icar, NC, out west.

Petey had also visited Grannies that day to get himself a chicken-fried steak sandwich.  A plate sized slab of meat, nestled into a standard-sized hamburger bun, lathered with white gravy.  He loved it and was excited they were at the fair.

I hadn’t planned on eating more after the contest, but when I saw another sandwich on thier menu, my resolve crumbled.  It was freshly fried green tomatoes covered with lashings of pimento cheese.

It was absolutely amazing.  I’m going back on closing day, and guess what I’m having for lunch?

Hope to see you there.

Thanks for your time.

Nitty gritty on the fair

When I was thinking about this column about the state fair, I planned on talking about all the crazy deep-fried stuff by making up a list of foods that they don’t fry—as a joke.

There’s only one problem with that strategy; there is nary a food that somebody hasn’t put on a stick, and thrown into hot fat.

So, here’s what I came up with:

Have you heard of the new fried items at the state fair this year?  They’re doing deep fried ennui, and batter-dipped righteous indignation.  They serve them in a cone with modesty dipping sauce, and a sarcastic drizzle.

I don’t know—funny?  Or just weird?

But gosh, I do love the state fair; everything about it.

I love the fact that you can people watch, and see every type of human that North Carolina has to offer.  I love all the disparate groups that show up to advocate for themselves (and the free stuff they hand out).  I love that fact that because it happens in October, there’s usually a nip in the air that’s a harbinger of cooler things to come.

And, slap my mouth and call me Sadie, I love the food.

Every year, my absolute must-haves are Al’s fries, root beer in those behemoth aluminum tankards, and fudge.  But the fudge can only be from All-American Fudge.  No other will do.  I buy as much as I can afford, and my Sherpa Petey will carry without complaint.  Does fudge freeze?

This year, I had the added pleasure of being a judge at one of the many food contests.  It was all kinds of fun, and Lisa Prince (you’ve probably seen her on WRAL’s noon news, serving up NC grub), specialist for the North Carolina Department of Agriculture and Consumer Services, her fellow ag folk, as well as my fellow judges, were funny, kind, and took very good care of this tenderfoot.

Lisa’s been sending me all the winning recipes for each category this year.  One that sounds really tasty was the winner for House-Autry mills “Kiss My Grits” contest.  They carry a line of dinner grits; of which I heartily approve.

This dish is the brainchild of Mary Boury of Raleigh.

Cheesy BLT Grits Cakes

1 cup House-Autry Mills yellow stone ground grits

2 cups water

1 cup half & half

12 slices bacon, cooked crisp and crumbled

1 cup shredded pepper jack cheese

½ tsp. hot sauce

1 egg, beaten

2 tsp. water

1 cup Panko

Vegetable oil

Arugula

6 Sliced Tomatoes

3 Tablespoons spicy mayo

1 Tablespoon half and half

Combine grits, 2 cups water and half and half in a medium size pot and cook according to package directions.  Then stir in 6 slices of crumbled bacon, pepper jack cheese and hot sauce.  Spread into a 9 x 9 baking dish and refrigerate overnight.

Cut grits into 6 circles. Combine beaten egg with 2 tsp. of water.  Dip the grit cakes into the egg mixture and then into the panko crumbs on both sides.

Fill medium frying pan with enough oil to cover the bottom. Fry grit cakes until crisp and brown.

Combine spicy mayo with 1 Tablespoon of half and half.

Serve on a bed of arugula. Top each grit cake with a sliced tomato, crisp bacon and a drizzle of the spicy chipotle mayo.

So go, hie thee to the fair.  And if a tall, dark-haired, enraptured, woman stumbles past, mindlessly devouring fries, or guzzling root beer, say hi, it’s probably me.

Thanks for your time.

Rating the booty

For ranking Halloween haul, I have serious bone fides.

I’ve been eating candy for over half a century.  Although I did stop going door-to-door before I got my driver’s license, I did trick-or-treat a few years past the age when I should have.  When The Kid went out, I assiduously went through the resulting bag with a fine tooth comb, and an eye to what should be confiscated (for the child’s own good, of course).

And I love candy more than is healthy or fitting for any middle-aged woman.  One of my favorite departments in Southern Season is the candy section.  When I visit The Streets at Southpointe, I haunt the candy store like Jacob Marley’s ghost.

And still, to this day, I dream about candy, in all its alluring forms and bewitching permutations (Although I usually wake right before I get to partake.  I wonder what that means?).

A word about handing out the actual goods—unless you give full-size candy, always drop two or three pieces in each bag; so make sure you’ve procured enough.  If you run out, make a note to buy more next year, say good night, and turn out the lights—you’re done Gracie.

Also, despite some dissenting opinions; fun-size candy bars are just fine.  It’s a good snack size, and more of a variety can be obtained.  But don’t cheap out with knock-offs.  Nobody wants to open their bag and pull out a “Murky Way”, or a “Mr. Good Enough Bar”.

So here, without further ado, in descending order, is my 2015 Halloween treat round-up.  The definitive list of what to buy, what to skip and what deserves a couple of rolls of toilet paper festooning your trees.

Don’t be that guy.

1.)Milk chocolate with caramel, AKA-Caramello, Rolos, and Milk Duds-Was there ever a better combination than melty milk chocolate and sweet, sticky caramel? This is a better twosome than the Wright Brothers or Brangelina.  This category also includes higher end bars like Godiva and Ghirardelli.  Toffee bars such as Heath and Skor also count.

2.)Milk chocolate with caramel and one or two additions like Milky Way, Snickers, and Whatchamacallits. As long as the extra ingredient isn’t coconut, I say bring it on.  You could cover Flintstones chew-ables with chocolate and caramel, and it would be tasty.

3.)Chocolate in combination with nuts and nut products, such as Reese’s, Mr. Goodbar, Chunky and Butterfinger. This does not include Reese’s Pieces.  If peanut butter for some calamitous reason is not paired with chocolate, the only other good partnership is with apple jelly on a sandwich.  Case closed.

4.)Milk chocolate paired with one other non-nut item (Provisional). 3 Musketeers, Nestle Crunch, Kit Kat all score.  As long as that one other item IS NOT COCONUT.

5.)Solo chocolate. Good naked chocolate can be terrific, but the proliferation of sub-standard, chalky, or waxy holiday confections drops this category to fifth place.  M&M’s though, are always welcome.  Also, and very important; while in my advanced years I have developed a slight fondness for some dark chocolates, it is kryptonite to little kids, and will only result in sadness and tears.  Nobody under the age of fourteen (or Petey) wants that Special Dark mini-bar.

6.) Taffy.  But only the flavors of vanilla or banana.

7.)Hard candy, including lollypops. Charms Blow Pops are awesome.  Tootsie Roll Pops and Dum Dums, while not my cup of tea, are festive looking, and can be traded for real candy.  Jolly Ranchers are acceptable, but only green apple.

8.)Non-candy, toys. This is a risky category.  While candy is always preferred, a fun or novel toy or Halloween-themed item can work; but it’s a tricky proposition to choose well.  So, except for a couple of goody bags set aside for children with food allergies, it’s safer to steer clear.

Pass the Charmin…

9.)Non-candy, good for you. Tooth brushes, raisins, granola; don’t…just don’t.  Halloween is for indulgence and belly aches.  If you can’t get into the hedonistic spirit of the night, save your money, and turn off the porch light.

My very best advice for Halloween goodies is this:  buy exactly what you like, no matter what it is, and hope you have very few tiny, costumed panhandlers.  Happy haunting!

Thanks for your time.

Going rogue on Halloween

What’s one of the most subversive acts one can commit in 2015?

Giving out homemade goodies to little trick-or-treating hobgoblins.

I know.  Hey, I was of trick-or-treating age when the razor blades in apples stories started.  Although really, out of everything in a sugar-drenched Halloween haul who actually eats the apple?  The kind of kid that reminds the teacher that she forgot to assign homework over the weekend, that’s who.

Umm, excuse me, teacher…

But we’ve all been so conditioned against it that to giving homemade treats is a shocking act analogous to running away with the milkman or blowing your entire paycheck on footy pajamas.

With a little preparation, it’s simple to hand out scratch-made goodies that will actually be eaten and enjoyed.  When you bag your treats, just include a tag with your name and address, along with a description of the items, as well as a list of potential allergens.

Like this:

halloween tag

And even if you can’t quite bring yourself to be so daring, it’s still fun to have some handmade candy.  I’ve got some recipes that are spooky easy, and lots of fun to make with your own little boys and ghouls.

These are very simple treats, but for two of them, chocolate has to be melted.  The easiest way is to use the microwave.  Do it slowly, and in 30 second increments.  Stir after each 30 seconds, and when it’s almost all melted, just stir until it’s completely smooth, rather than putting it back in the microwave.  This will keep the chocolate from scorching, which ruins it.

To keep the chocolate thin while working with it, sit the bowl on a heating pad set to low.

The first confection is for my mom.  One of her favorite candies is a Chunky bar.

Gramma’s Chunkies

halloween chunky

1-12 ounce bag milk chocolate chips

1 cup salted peanuts

½ cup raisins

½ cup orange Wilson candy melts (found online and in craft stores)

In a glass or plastic bowl, melt chocolate.  When completely melted and smooth, gently stir in peanuts and raisins.  Spoon mixture into a 12 spot ice cube tray, then smack it onto counter-top to get rid of air pockets.  Let harden.

When it’s totally set, pop out of tray.  Set on parchment paper, large side down.  Melt the orange candies.  Dip a fork into melted candy, and squiggle lines on the chunkies. 

Makes 12.

Chocolate Coated Peanut Butter Pretzels

choc pretzels

1-12 ounce bag milk chocolate chips

1-12 ounce bag semi-sweet chips

18 ounces peanut butter stuffed pretzel nuggets

1/3 cup finely chopped salted peanuts

Melt chocolates together.  Dip each pretzel into chocolate, and sprinkle with a bit of the chopped peanuts.  Allow to harden on parchment.  Makes approx. 4 dozen.

Saltine Toffee

saltine toffee

1 ½ sleeves saltine crackers

1 ¼ cup unsalted butter

1 ¼ cup light brown sugar

1-12 ounce bag chocolate chips

Directions:

Preheat oven to 400. Line rimmed baking sheet with foil that has been sprayed with non-stick spray.

Lay out crackers in one layer. In a medium-sized saucepan melt butter and brown sugar. Stirring often, bring to full rolling boil, then boil mixture for exactly 3 minutes.

Pour over saltines and bake 5 minutes.

Remove from oven and sprinkle with chocolate chips and when they’re nice and melty spread them out evenly all over saltines.

Refrigerate until set then break into pieces.  Store in air-tight container.

I hope you go nuts and hand out homemade goods to trick-or-treaters.  But even if you don’t, make some of these sweets and have yourself a sugar-fueled Halloween bacchanalia.

Thanks for your time.

Tuna didgeridoo

“You can tune a piano but you can’t tuna fish.”  I’ve always loved that joke.

I’ve always wanted to play a didgeridoo-really! Just ask Petey. I want a pet bear, bee hives, and to play the didgeridoo. My life would then be complete.

On the other hand, didgeridoo sounds way funnier than piano.

Growing up, whenever there was some kind of potluck, cookout, or cold dinner, my mom and her sisters made two or three mayonnaise-based salads for it.

Sometimes there would be a salad of macaroni, chopped hard-cooked egg, onion, and mayo.  Sometimes it was the most basic coleslaw in the world: shredded cabbage and carrots, mixed with straight mayonnaise.

The glue that holds our family together…

There would always be potato salad; spuds, chopped eggs and onions mixed with old man mayo.  Sometimes, to mix things up, there might be chopped baby dills, or crispy bacon (as earth-shattering as you’d imagine it to be).  The other eternal standby was a tuna and macaroni mélange; mixed with…you guessed it, mayonnaise.

With just the tuna I already liked, but mixed with macaroni instead of spread on Wonder bread like normal.  I loved it.

Straight mayo–a dried out, greasy mess.

I still love the mild flavor.  But over the years have identified a serious problem with the mac/mayo marriage.  Unlike potatoes, there’s no limit to the absorption of pasta.  The longer a mixed bowl of tuna mac sits, the more mayonnaise it absorbs, and the drier the salad gets.  So I fixed it.  And with that problem solved, I changed the pasta to something that was unexpected, and brought a texture to the party that I enjoyed much more.

I also wanted to put more color and flavor into it.

Tuned up didgeridoo salad

tuna pasta

1 7oz can albacore tuna in water

¾ cup frozen baby peas, blanched and shocked

1 shallot, diced

1/3 cup sundried tomatoes in oil, rinsed clean and sliced into matchsticks

1 cup Fideo 0, or angel hair pasta broken into 1-2 inch pieces, cooked al dente, drained and cooled

Olive oil

Red leaf lettuce or arugula

Smoked paprika

 Dressing:

Whisk together (you want the consistency of creamy salad dressing)

tuna dressing

1 cup mayonnaise

1/3 cup (more or less) water

1 tablespoon chopped fresh dill

Salt and pepper to taste

Place pasta, peas, shallot, and tomatoes into a bowl.  Drizzle with a bit of olive oil and gently, gently stir until the pasta is in individual strands, and not clumped together.  Break up tuna in pieces and stir into pasta.  Fold in dressing, a bit at a time, until it’s loose and moistened.  Cover with plastic wrap and let sit at room temp for 1 hour before service.

When ready to serve, uncover and check for seasoning and moisture.  If needed, mix in a tablespoon at a time of water until it’s moist and able to be spooned out onto plate. 

Serve on a bed of red leaf lettuce or arugula, dusted with paprika.

Serves 4 as a main, or 6-8 as a side.

As the kitchen Cab Calloway, I’ve got some ideas for jazzing up this simple salad.

Salmon’s an option.  You can go canned or fresh.  If you’re using fresh salmon, poach it in some herb and lemon-infused vegetable stock for 5-10 minutes.  You can also bake it.  Just paint it with a little Dijon mustard and sprinkle on salt, pepper, and fresh dill.  Put it in a 450 degree oven for 12-15 minutes.  Cook the fish until it’s no longer translucent, and just starting to flake.  Let it cool completely, and flake into salad.

Try it with thawed and drained salad shrimp.

Having a bag of these in your freezer is a great idea.

Use fresh tuna.  Season a steak, and cook it in a screaming hot skillet for 3 minutes a side.  The center should still be pink.  Cool and slice into bite-size pieces.

The dressing is flexible as well.  Add fresh tarragon, basil or parsley.  Add some heat in the form of cayenne or chiles.  Add Dijon to the mayo.  Thin it with fat-free buttermilk, instead of water.

Israeli couscous is basically just little pasta balls…what’s not to love?

The noodle isn’t mandatory.  Use orzo, orecchiette, or cavatappi.  You could even lose the pasta altogether and go with pearl barley, Israeli couscous, or quinoa.  Instead of plating it on the greens, mix them right in.  Add different vegetables, or some nuts, for crunch.

It’s possible to really change up this salad.  So much so that you could be eating a bowl of cornflakes with bananas and milk, and still technically be eating my tuna pasta salad.

It’s just my tuna pasta salad with a couple of tweaks…

Thanks for your time.

Justify my love

This store is in Montpelier, VT. It’s one of our favorites.

Every time The Kid and I are near any kitchen store, we always go in.  Once inside, we play a game.  The game is called “Find the most ridiculous uni-tasker”.

A uni-tasker is exactly what it sounds like.  It’s a tool or gadget with only one function.

Here’s a partial list of some of the most absurd, harebrained gizmos of all time:

  • An avocado tool. It’s basically a thin flexible piece of metal with avocado green and yellow plastic accents.  A paring knife and a spoon will do the same thing.
  • Strawberry huller. Exactly what it says, and exactly what you can do with a paring knife or your thumbnail.
  • A banana slicer—‘nuff said.

So when I bring something new into my kitchen, it had better have many functions, or be the world’s greatest doer of whatever it does do.

It needs to justify its existence and my love.

Fine mesh strainer: Not only is this used to drain pasta, potatoes, and what have you, it also works well for washing fruits and veggies.  I also use it to drain canned beans, tuna, and cooked hamburger.

Another use is a sifter.  Put in your dry ingredients and gently shake or knock against the side of the bowl.  You can also use it to sift powdered sugar or cocoa onto a desert.

Kirkland stretch-tite: When I first starting hanging out in restaurant kitchens, I noticed, then coveted something; awesome, sticky, stretchy plastic wrap.  This isn’t your mother’s Saran wrap.  This stuff not only sticks to everything (even stainless steel), it stretches to give you a crazy tight seal.  I buy mine at Costco.  And I’ve seen many people there buying it for their restaurants.

For a sandwich that will taste just-made fresh hours after you make it, wrap it tightly in parchment paper and slice it.  Then cover the whole thing with stretch-tite, pulling it taut.

This professionally-wrapped sandwich leads me to my next well-justified product,

Parchment paper: I once ran out of parchment paper, and I almost had to shut down my kitchen.  I use this for a million and one things.  I bake cookies on it, and then just slide the entire piece of paper with cookies right onto my cooling rack.  I line cake pans with it.  I use it as a rising base for free-form bread, and pizza dough.  I sift flour onto it, and carry it right to the mixer with much more control.  I wrap ribs in parchment, then secure with butcher’s twine before wrapping again in foil.  This keeps in all the moisture for long, slow cooking.

The ribs bring me to my next versatile item,

Butcher twine: Use it to tie bacon onto a piece of filet mignon.  Secure any kind of rolled meats; rollatini, stuffed cabbage, or even tamales.  Tie together sprigs of fresh rosemary, thyme, or any woody herbs, and you’ve got a bouquet garni.

Unrimmed AirBake cookie sheets: Cookies are one of the least often things I do with these pans.  With no rim I use it as a giant spatula, to move foil boats filled with russet potatoes.  To slide pizza on and off the racks.  I lay a cooling rack on top, slide it into a warm oven, and this keep fried items hot and crispy.

So, go through each room, evaluate everything, and make it justify its place in your home.  The spouse and kids you should probably leave alone, lest they turn an appraising eye your way.

Thanks for your time.

The big reveals

Truthfully, I was a little worried and sad.

The Crossroads restaurant at the Carolina Inn in Chapel Hill had gone through 18 months of renovation.

I’ve always loved its Colonial decor.   Lots of Delft blue brocade and sunny yellow accents.  Cherry wood, golden walls, and flowing draperies worked together to create a genteel, Early American space which to me, spoke to the history of not only the university, but the South, and even our nation.  I wasn’t eager for change.

A couple of weeks ago I received an invitation to come to the new Crossroads for what was termed a “guinea pig meal”.   It was dress rehearsal before the big re-opening.

OLYMPUS DIGITAL CAMERA

The first thing I noticed was the bar.  Instead of being enclosed it’s now part of the large open space which houses the main dining room.  It’s much lighter and more airy, but they kept the framed vintage Daily Tar Heel cartoons; thus retaining the irreverent, casual vibe.

After we were seated, I really started to look around the space.  It’s bright, and fresh, with almost bare white walls.  The large windows are uncovered.  The furniture and fabrics are muted and serene.

It should have felt cold and sterile.

OLYMPUS DIGITAL CAMERA

But it really worked.  The bones of the beautiful architecture of the room were visible.  The large unadorned windows looked out on trees that almost made me feel I was in an elegant treehouse.

It reminded me of a very old historic home which had been rescued and lovingly restored.  My view of the old décor mutated from stately and elegant, to fussy and dated.

I ordered a new menu item recommended by Crossroads executive chef James Clark; pickled shitakes.  When they arrived, I was sold.  They were plated on slices of cornbread with a drizzle of lemon aioli.  They were briny, acidic, and unexpected.

Chef James kindly sent me the recipe to share.

Soy pickled shitake mushrooms

KDP_004102

Mushrooms:

20 Shiitake Mushroom Caps

3 tablespoons Olive Oil

Salt and Pepper

Pre heat oven to 400 degrees.  Place mushroom caps in a bowl and drizzle over with the olive oil.  Season with the salt and pepper.

Place mushrooms on an unlined cookie sheet with the mushroom gills down.  Put in the oven and cook until edges get crispy

Pickling Liquid:

2 tablespoons Sugar

½ cup soy sauce

1 cup apple cider vinegar

1 tablespoon minced ginger

1 tablespoon minced shallot

1 tablespoon Minced garlic

1 teaspoon Mustard seeds

1 teaspoon Coriander seeds

½ teaspoon chili flakes

2 tablespoons chopped cilantro

Very simple: mix, heat and pour over the mushrooms!  Allow them to cool then they’re ready to serve.

Just last week I had my very first Cuban sandwich.  I liked it, but I think these would be amazing as a replacement to the regular dill pickles usually found on it.

Any dish where a pop of bright acid is needed would be a perfect match.  Maybe as an Oriental twist on dressing for seafood:

Asian tartar sauce

asian tartar

1 cup Japanese mayonnaise

1 ½ teaspoons toasted sesame oil

¼ cup chopped pickled shitakes

1 shallot, diced

3 tablespoons rice wine vinegar

1 tablespoon duck sauce or honey

Salt and pepper to taste

Whisk together and chill for at least one hour before service.

As much as I enjoyed the dinner, Petey was especially affected by it.  He dined on the trout, which was served on a bed of roasted apples, corn and Swiss chard with a cider moonshine reduction.

Every item was perfectly prepared.  And obviously Chef had put much thought in the accompanying ingredients.  Each successfully worked with the others.

When Petey tried his first forkful with a bit of everything on it, he actually moaned.  I could literally see his face change as he realized the true meaning of fine dining.

It’s not chowing down on fancy expensive grub while wearing tight shirts and uncomfortable shoes.  It’s not seeing or being seen in the hottest, trendiest spot.

It’s a symphony on a plate; where each component has been teased into the best version of itself.  It’s thoughtful arrangement of the composition with all parts coming together in constantly changing permutations that surprise and delight the diner.

OLYMPUS DIGITAL CAMERA

Part of the Crossroads orchestra. From left: Maestro, Composer, and Executive Chef James Clark, Pastry Chef Sara Thomas, Executive Sous Chef Bill Hartley, Chef de Cuisine Jonathan James.

It is edible art.

Thanks for your time.

Belly up to the new bar

He’s the man who taught me how to filet a fish.  He also made the only chicken wings I’ve ever enjoyed.  And he has, more than once, let me live out my fantasy of working in a restaurant kitchen.

It wasn’t this fish…

His name is James Clark, and he’s the executive chef of the Carolina Inn.

For the last year and a half, the Crossroads restaurant has been undergoing renovations.  They had the grand reopening on September 18th.  On September 17th, Petey and I were invited to dinner there for a sort of dress rehearsal.

And in honor of the new decor, Chef James has a new menu.

His food philosophy is simple.  He gets the best quality ingredients he can and with them elevates Southern favorites.

KDP_004254

On his menu is the number one comfort food of America—macaroni and cheese.  But like always, Chef waved his magic wand and transformed it.  This is a creamy unctuous dish topped with slices of slowly braised, browned pork belly.

Braised Pork Belly with Smoked Cheddar Mac

Crispy Pork Belly: 

2 pounds Fresh Pork Belly

2 cloves Garlic

2 Shallots

3 Springs Thyme

2 Liter Bottle Barq’s Root Beer

Salt and Pepper

p belly

 –            First in a cast iron pan season and slowly pan sear the Pork Belly so to not burn the outside.  Once it is crispy on all edges remove from the pan and place in a braising pan with deep sides and rack underneath.

–            Back in the Skillet add the shallots and garlic and sweat until soft add the root beer and pour over the pork belly until the liquid covers it.  Add the thyme, cover with foil and place into a pre heated 225 degree oven and braise for 5 hours

–            After 5 hours remove the belly from the oven and allow to cool for 1 hour. With a pair of tongs in each hand pull out the pork belly that is on the rack.  Remove any of the shallots or thyme stems and transfer the belly into a clean pan.  Take a similar pan place on top then weight it down as to form and press the belly.

–            Place into the refrigerator and allow it to sit for 1 day.

Smoked Cheddar Mac:

mac chee

¼ Pound AP Flour

¼ Pound Butter

1 quart Heavy Cream

2 cups mild cheddar shredded

2 cups smoked cheddar shredded

1 pound Mini Mac Noodles cooked

 –            In a heavy bottom sauce pot on medium heat melt the butter and whisk in the flour.  Continue stirring and once it begins to simmer keep stirring until the roux have a nice dark blond color.

–            Slightly heat the cream in a separate pot then add it to the roux stirring out any lumps.

–            Once the roux and cream are well mixed turn the heat down to a slow simmer and continue to cook and stir until the flour pasty taste goes away about 10-12min.

–            Add your cheese and season with salt and pepper

 To assemble:

 Heat the smoked cheddar sauce up and add in the mac noodles and stir.

Sear the cooked pork belly until crispy and slice. Top the mac with it!

Enjoy

Each time Chef feeds me, I eat like a camel, ingesting as much as possible until the time comes when I can eat his cooking again.  But there’s a really good chance I might be eating his mac & cheese a couple of times before I visit the Carolina again.

Thanks for your time.