Salad ‘daise

No matter where, or when, if I’m eating out and there are Eggs Benedict on the menu, I order it.  And I always ask for extra Hollandaise.

When I am lucky enough to have potato salad on my plate, I eat everything else then slowly, savoring each bite, consume my potato salad.What do these facts say about me?

  • That if I can see the finish line and the wait isn’t too long, I enjoy a small amount of not-too-delayed gratification.
  • I’m a big fan of silky, well-made emulsification.

This is the fifth and final week of our mother sauce series.  We are wrapping up with my very favorite, Hollandaise.  And although some people might disagree, The Kid and I firmly believe that because of the emulsification in the making of it, mayonnaise belongs in this category as a sort of step-daughter
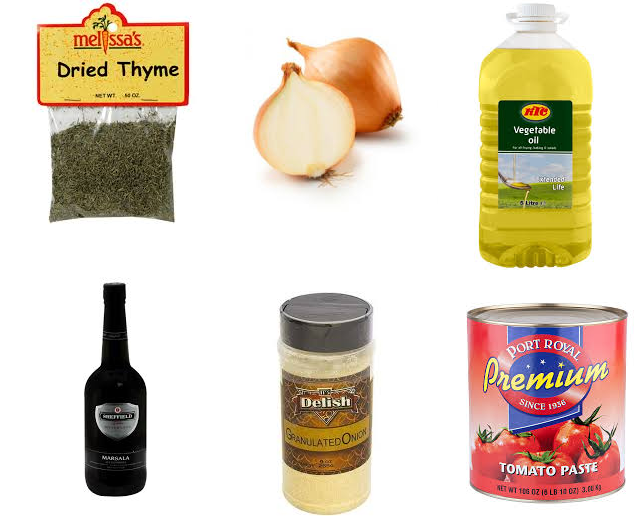
The info on this sauce is all over the place.  It was either invented in the 1600’s or maybe the 1700’s.  Hollandaise is named for the region in Netherlands, either because it was invented there, or because Holland has the best eggs and butter, which are the two main ingredients.

Traditionally, Hollandaise sauce is not the easiest of mothers.  It involves a double-boiler and whisking raw eggs over heat while retaining the smooth silky texture.  There are few tragedies as heart-rending as the sight of curdled or separated Hollandaise.

So just don’t make it at home, right?

Wrong.Long ago, my mom belonged to a book club.  Not the kind where you sit around in somebody’s living room drinking pinot and discussing the latest Oprah pick.  Books came in the mail.

One month it was a cookbook; The New York Times International Cookbook by Craig Claiborne.  Years later, Mom gave it to me.  I had no idea that the author was considered one of this country’s all-time best food writers.  I also didn’t have a clue that one day I would be a food writer myself.  But, as an extreme novice in the kitchen, I took help and inspiration wherever I found it.

One day while perusing said cookbook, I stumbled upon a recipe for Hollandaise that to me, looked pretty doable.  Instead of the usual procedure that came with a huge possibility of inedible failure, it was made in a blender.

Craig Claiborne’s Blender Hollandaiseblender hollandaiseMakes 4 servings.

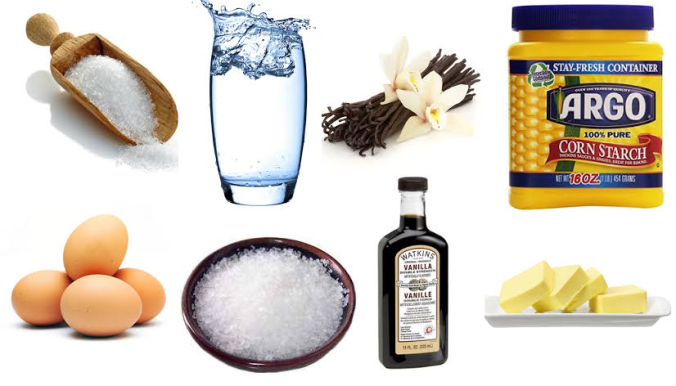
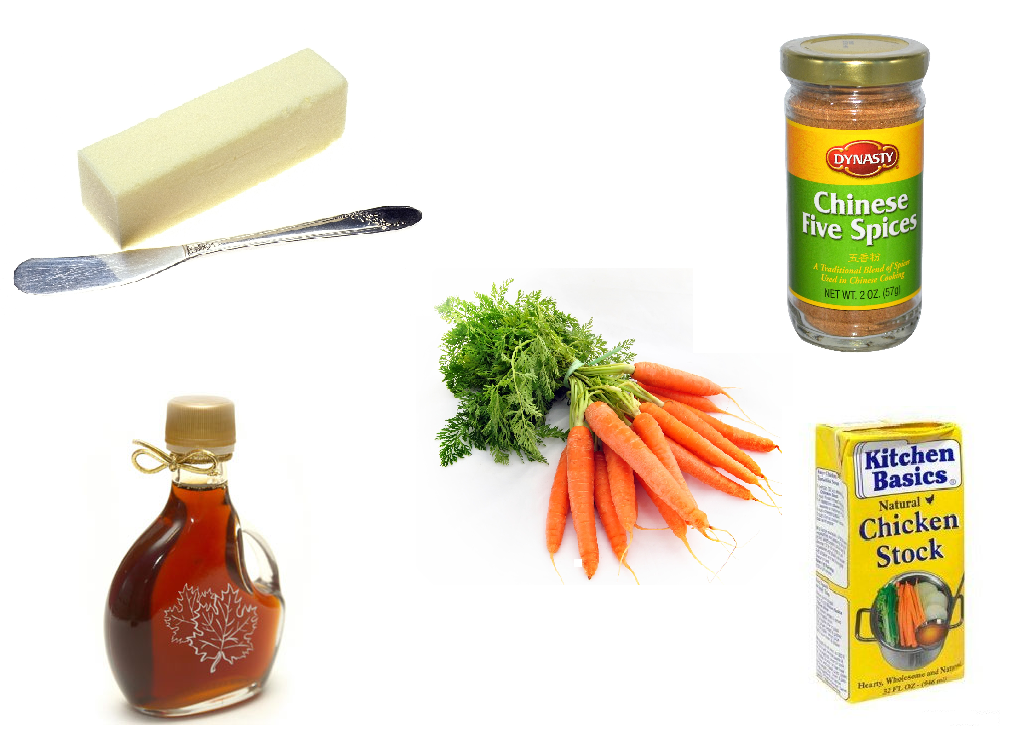
Heat one-half cup butter to bubbling; do not brown.  Into container of an electric blender, put two egg yolks, two tablespoons lemon juice, one-quarter teaspoon salt and a pinch of cayenne.  Flick motor quickly on and off twice at high speed.  Remove cover, turn motor on high and add butter gradually, until mixture thickens.  If too thick, add cold water.  Serve with vegetables, fish or eggs.

So it looks like you’ve got raw egg yolks in the sauce.  And if you are a child, pregnant, or have a compromised immune system, just steer clear.

But.

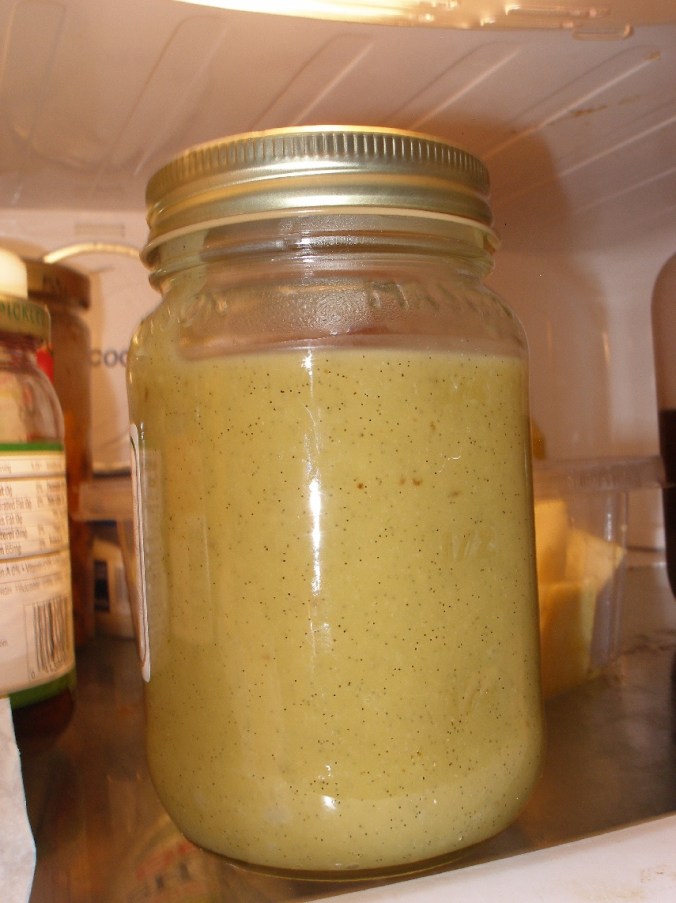
To get the butter nice and bubbly, shoot for 200 degrees (F).  An egg yolk is considered cooked enough to be safe at 145.  The hot butter and the friction from blending should put the yolks clearly in the “safe” category.
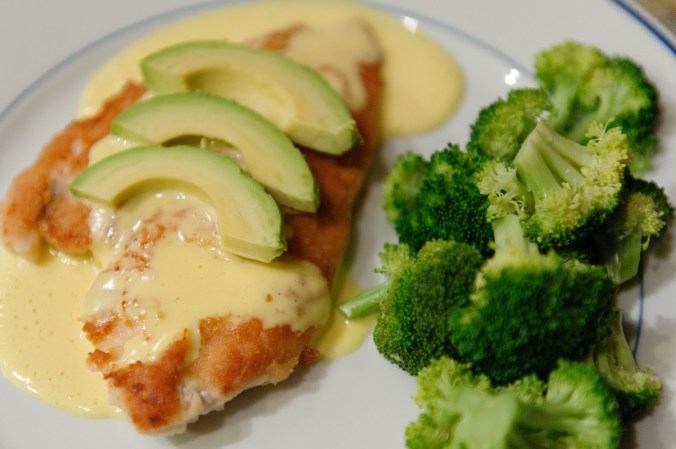
Like Craig says, the sauce goes great on veggies, fish, and eggs.  But I love it on fried, boneless, skinless chicken breasts and it’s crazy good on any type of pasta.

If you’re like me though, it doesn’t have to be all fancy-fied.  Forget the vessel on which to put it.  Just chug it right out of the blender.Thanks for your time.

Mad about plaid

Lemme tell you a little story.I really dislike coconut.  The flavor is actually okay, especially in piña coladas made even more decadent with lots of ice cream.  For me it’s a texture thing.  The Kid, however, has no such exceptions.  Coconut is dietary anathema.  It does not pass my child’s lips in any form.

Because of our animus, coconut has never had a place in my kitchen.

Petey eats it, but Petey is one of the least picky humans I know.  I’d always thought it was one more food that he could take or leave, but would eat if placed before him.

But a while back, after close to three decades of matrimony, I discovered something that I never knew about my better half—the man loves coconut.His favorite dessert has to be coconut cake, with many layers, lots of pastry cream filling and tons of 7-minute frosting.  And each component jam-packed with sweet, white shreds of coconut.  The man has a sweet tooth.  As do I.

Not so with The Kid, probably because in our house, sweets are not forbidden fruit, and I think this easy access produced an almost non-existent desire for most things sugary.
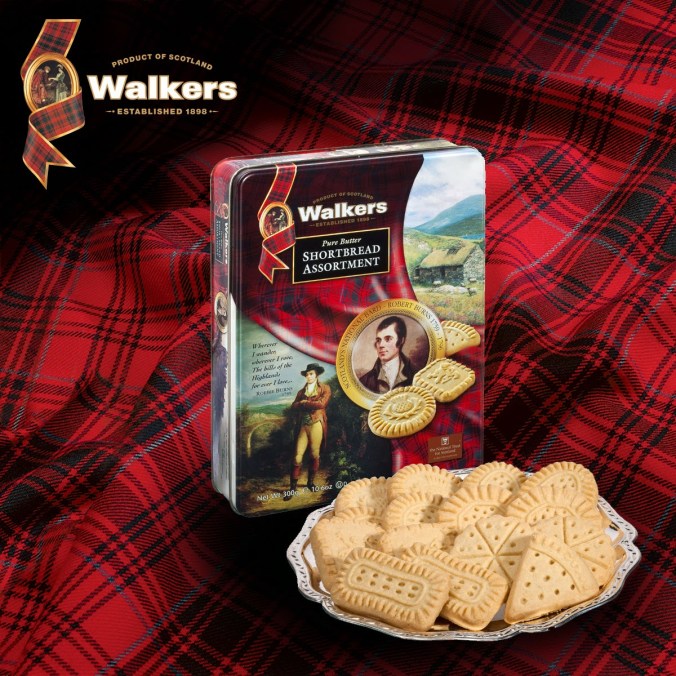
The Kid does though, have a big crush on shortbread.  Walker’s, the brand with the red plaid boxes are a special favorite.  Last year I made some for the child’s stocking.  That recipe was okay, but wasn’t as rich and buttery as Walker’s.

I wanted to make something a Walker’s devotee might mistake for their more famous shortbread cousin.  Last night I made another batch with a new recipe.

It’s based on a Martha Stewart recipe.  And in the making of it, I picked up a couple of tricks that will vastly improve your final product.Before baking, I cut the 9 X 13 pan of cookies into 40 pieces.  There were ten on the short side and four on the long; long rectangles which are called ‘fingers’.

I created these using my straight metal dough scraper, cutting all the way to the bottom.  Then I used a toothpick to place five neat holes down the length of each piece.  After they baked, I let them cool completely in the pan before turning them out.  I then used a serrated knife to convince them to break off cleanly.

And, as with any simple recipe with few ingredients, use the best quality you can swing.  It will make a difference.

Martha Stewart’s Walker-style shortbreadmartha-shortbread
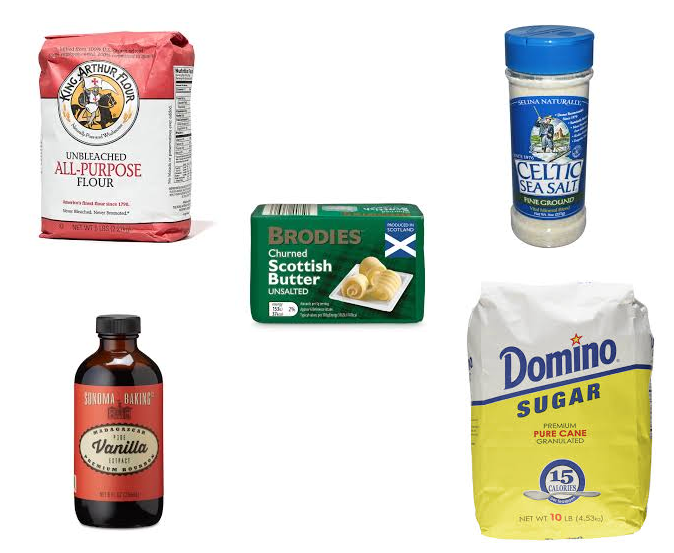
1 1/3 cups (2 sticks plus 6 tablespoons) butter, room temperature, plus more for pans

2/3 cup sugar

3/4 teaspoon salt

3/4 teaspoon pure vanilla extract

3 1/3 cups all-purpose flour

Preheat oven to 275 degrees. Butter a 9-by-13-by-1-inch baking pan, and line bottom with parchment paper. In the bowl of an electric mixer fitted with the paddle attachment, cream butter and sugar on medium speed until light and fluffy, about 2 minutes. Add salt and vanilla, and beat to combine. Add flour, 1 cup at a time, beating on low speed until just combined.

Press dough into prepared pan, leveling and smoothing the top.

Bake shortbread until evenly pale golden, but not browned, 70 to 85 minutes. Transfer pan to a wire rack to cool. Invert pan, and remove parchment.

shortbread

The Kid’s Christmas shortbread.

When completely cooled turn shortbread out of pan, score cuts with a serrated knife, and carefully break into bars.  Store in an airtight container for up to 1 month.

I planned to flavor the shortbread with lemon zest and nutmeg.  But I discovered something else about my child.

Like a classic Chanel suit, The Kid likes it best simple and unadorned.
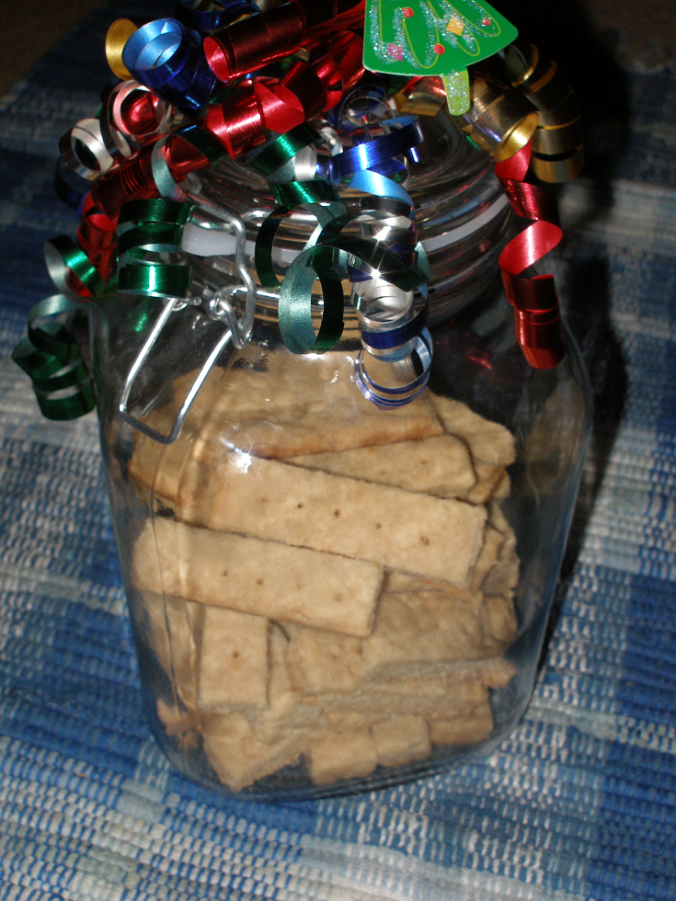
In the case of shortbread, less is most definitely more.

Thanks for your time.

Sloshed, yet sophisticated

Q

It even looks sinister, doesn’t it?


When I was a very little girl, and had a horrible tummy ache, as a last resort my mom gave me this miracle medicine.  It never failed to calm my belly and send me off into drugged slumber.  It was available over the counter until 1970 and was called paregoric.  The flavor was why the phrase “medicinal tasting” was invented.  It was also chock full of morphine (guess that’s why you can’t just pick a bottle off the shelf at the Rexall anymore).

About two and a half centuries later, when I was a bartender at a country club, I made swimming pools full of gin and tonics without indulging.  Finally, I took a taste.

I was transported right back to my footy pajamas, choking down a spoonful of that nasty stomach medicine.  Nope, I decided that g&t tastes like paregoric, and thus would never again pass these lips.

I’m not really a big drinker anyway.  For a few reasons.

  • I don’t drink very much of anything. In my entire life, I don’t believe I’ve ever finished a bottle of Coca-Cola all by myself.
  • Being out of control is scary and embarrassing. The worst is when sober Debbie’s in my head, trying to help, and drunk Debbie’s yelling, “Back off, Captain Buzz Killington! Besides, we’re fine; totally graceful, witty, and charming.”
  • Alcohol is stuffed full of calories. And if I’m mindlessly consuming vast quantities of calories, they absolutely need to be of the chocolate persuasion.

But on Saturday, June 11th, The Kid and I went to The Carolina Inn for a BBQ Throwdown.  There would also be plenty of various alcoholic libations

When I woke up that morning, I decided that at the throw down, all nutritional bets and caloric considerations were off.

Right after we checked in and got our arm bands, we sampled four kinds of Jack Daniels.  They were good.

Then somehow I decided it was time to give gin another chance (although it may have been the Bourbon samples deciding for me).  There were garnish ingredients so we could personalize or drinks.

I chose cucumber and lime.

How glad I am that I gave this most British of spirits a second chance.  It was clean and bracing.  The garnish worked well.  And it gave me an idea.

Cucumber Gin

cuc gin

1 Fifth of crystal gin minus 1/2 cup or so

2 cucumbers, peeled and grated

Stuff cukes in bottle of gin.  Let sit in a cool dark place for 2 weeks.  Drain, and pour gin back into bottle. 

Green gin and tonic:

green gibn

2 ounces cucumber gin

4 ounces tonic water

½ lime

Pour gin and tonic into a rocks glass with ice.  Squeeze lime into glass.  Give it a gentle stir.  Run the squeezed lime around the rim of the glass.  Serve.

There were eight competitors, and I had at last one small plate from each—and more than one at a few.

The Carolina Crossroads’s Chef James Clark and his right-hand man, Chef Bill made my heart race in the very best possible way.  Duck barbecue, and fries covered in lashings of roasted tomato aioli.

I took elements from Chef James’ entry to make some finger food.

B.L. Teenies

Roasted tomato aioli:

tomato aioli

Cut 10-12 Roma tomatoes in half, length-wise.  Sprinkle with olive oil, salt, pepper, and thyme.  Roast at 450 for 25 minutes or ‘til dry and caramelized.

Chop in food processor until completely smooth.  Stir into 2 cups mayo, either homemade or store-bought.

Teenies:

teenies

Cut leftover grits into rounds, 2 inches across by ½ inch thick

1 tablespoon butter

Toast grit rounds in butter until browned on both sides.

Then drop a small amount of pea shoots on each round.  Lay on top crispy piece of bacon, about 1 ½ inches square. Drizzle aioli on top. 

After the gin and an orange old fashion my knees got a little noodle-like, I knew it was time to switch to water.

But the other guests at the Throw Down have no idea what they missed.  One more glass full of liquid courage, and I would have swung from the chandelier while singing an enthusiastic if not melodious acapella version of Pink Cadillac.

Thanks for your time.

The Red Menace

There are three types of people.

There are folks who like brown/mushroom gravy inside, outside, and on the side of their meatloaf.  And there are those who love meatloaf to come sporting a shiny red cap of glaze.

I actually have a Kitchenaid, but other than that, this looks exactly like me when cooking.

But there are the enlightened ones, those noble humans whom, like myself, have love for both varieties.

The Kid?  Not so much.  That child likes red meatloaf about as much as flat beer and the heartbreak of psoriasis.  If it ain’t brown, The Kid ain’t down.

There is one little logistical glitch, though, with red meatloaf.

We can do way better than this…

When I make brown meatloaf, I start by making a nice, rich mushroom gravy.  I then use it in the mix, I ladle it over the top for baking, and spoon it over the mandatory buttermilk mashed potatoes.  And no matter its complexion, with an old school protein like meatloaf, potatoes are in fact, mandatory.

French fries just don’t work.  It’s like black suede boots with a white eyelet dress.  Baked potatoes are an option, but fully dressed is an awful lot of starch and fat.  And red meatloaf isn’t terribly flashy as a main, you don’t want it to disappear completely next to the showgirl that is a loaded spud.

My answer is to serve braised baby potatoes.

Braised Baby Potatoes with Herbs

braised creamers

2 pounds baby potatoes or little creamers, washed
1 cup beef stock
4 tablespoons butter
1 teaspoon kosher salt
½ teaspoon freshly ground pepper
1 tablespoon chopped fresh parsley
1 tablespoon chopped herb of your choice (like chives, dill, or tarragon)
Throw everything into a large heavy pot with a lid.
Cover and cook on medium until the potatoes are fork-tender (15-20 minutes), stirring frequently.
Uncover and let the liquid cook down into a thick, buttery sauce.
Right before service, stir in herbs and check for seasoning. Makes 4 servings.

I’ve broken down the meatloaf into small steps.You can do them early in the day; or even the day before, then put it together right before baking.

Red Glazed Meatloaf

Glazed onions:

glazed onions

1 yellow onion, chopped

1 tablespoon vegetable oil

½ teaspoon dried thyme

½ tablespoon granulated onion

1 tablespoon tomato paste

½ cup Marsala wine

Pinch of salt and pepper

Directions:

Heat a skillet and add veg oil.  Put in chopped onion, thyme, granulated onion.  Cook until onions start to brown around the edges.  Stir in tomato paste.  When the paste darkens, pour in Marsala.  Let the wine cook out, then take off heat.

Meatloaf mix:

red meatloaf

4 slices multi-grain bread, ground fine in a food processor

4 eggs 

1 tablespoon Worcestershire sauce

2 tablespoons horseradish

2 pounds ground chuck

Salt and pepper

Directions:

In a large bowl, place in bread crumbs, eggs, Worcestershire sauce, and horseradish.  Add cooked onions.  Mix everything with vigor until it is a homogenous mass.  Break beef into large chunks and put in bowl.  Using clean hands or disposable gloves, mix meat and bread crumb mix until it is completely mixed in.  Form into loaf shape.

Glaze:

red glaze

1 cup ketchup, divided

1/4 teaspoon smoked paprika

2 teaspoons brown sugar

2 teaspoons balsamic vinegar

2 teaspoons horseradish

Pinch salt and pepper

Directions:

Take out ½ cup of ketchup and set aside.  Whisk together the other half cup of ketchup and the rest of the glaze ingredients.  Spread 1 tablespoon of this in the bottom of the dish in which you’re baking the meatloaf.  Using a paint brush, paint the glaze all over the meatloaf.

Bake at 350 for 40 minutes.  Remove from oven and pour/paint the plain ketchup on the top.  Return to oven and bake 30 minutes more.

Remove from oven and let rest for 20 minutes before service.  Serves 5-6.

I served this with my cool, crunchy broccoli salad.

Bacon Broccoli Salad

broccoli salad 2.0

4 large stalks of broccoli
4 pieces bacon
1/3 cup grated parmesan, divided
1 cup mayonnaise
Hot water
½ teaspoon salt
¼ teaspoon pepper
Place bacon on parchment-lined rimmed baking sheet. Put it in the oven, then set oven to 350 (if you put the bacon into a hot oven it will seize up and never fully render; it also keeps the slices flatter). Cook for 15 minutes, flip each piece over and cook until it is golden brown and crispy. Remove from oven to a paper-towel covered plate. Reserve ¼ cup bacon grease for dressing.
While the bacon is cooking, cut the broccoli into small, bite-size florets. Place into a large bowl with half the cheese.
For dressing, whisk together mayo, bacon fat, and parmesan. Thin with hot water, a little at a time until it’s the consistency of pancake batter. Mix into broccoli until it’s lightly coated. Refrigerate until service. Makes about 8 servings.

If you have leftovers, the meatloaf makes epic sandwiches.  Just slice and put it in a hot skillet.  Cook until it browns and forms a crust.  Flip and cook the other side then melt a thick slice of horseradish cheddar on it.

You know, I’ve been thinking about that “three kinds of meatloaf people” philosophy, and I think I need to amend it.

What if you don’t eat red meat? Or you like it cheese-stuffed, or bacon wrapped?  Maybe you like it spicy, or Horrors! What if you actually don’t like meatloaf at all?

You know…there is one meatloaf that I could live without.

Thanks for your time.

Melissa’s Pie

My paternal grandmother, Geraldine, made awesome pie crust.  The grandchildren would dance around for the little cookies she made with dough scraps, jockeying for position to score the first one out of the oven, gladly accepting the trade-off of burned little hands and tongues.

My mom makes great pies.  Lemon meringue, apple, and her world-famous pecan are only a few.  But her crusts come from the supermarket’s refrigerated section.

I always assumed that I didn’t have the patience to make crust from scratch, so on the infrequent occasions that I needed pastry, I used pre-made.

Evidently, they’ve been doing this for a long time…

But as I learned to cook, pie became my secret shame.  There’s nothing wrong with using pre-made, but not knowing how to make pastry was a hit to my ego, and a milestone I should have already passed.

Then I saw Melissa D’Arabian, a TV chef I admire greatly, make pastry dough on Food Network.  It looked do-able.  A French master baker/chef said that her crust was just as good as he could do.  So I tried and it worked like a charm.

I’ve made it probably 100 times since then and never had any problems.  It works great for single and double crust pies, and the hand pies that come from her dough are so pretty and tasty, I feel like I should pay someone for such glorious eats.

Melissa-inspired pie crust

pie crust

1 cup butter (2 sticks), cubed and chilled

2 ½ cups + ½ tablespoon cake flour

1 teaspoon salt

3 tablespoons very cold vodka (Vodka is tasteless in the cooked crust.  But feel free to add another kind to lend flavor to the finished product; bourbon for pecan or apple for example, or amaretto for peach pie.)

5-8 tablespoons ice water

Put the butter, flour, and salt in the food processor, and pulse lightly just until the mixture resembles wet sand. Add vodka then water, 1 tablespoon at a time, pulsing briefly after each spoonful. Keep adding liquid until the dough just begins to gather into larger clumps.  Pour dough onto flat surface and lightly knead just until it comes together.

Divide dough in half and transfer into re-sealable plastic bags and pat into disks. Let rest in refrigerator for 30 minutes. Or freeze for later. 

Before baking, chill formed dough for 30-60 minutes.  Bake at 425 degrees until golden, timing depends on size and shape of product.

cropped-pc090039.jpg

Chicken pies that I made with homemade magic crust.

I add vodka to lower the chances gluten developing.  Gluten is the protein that makes bread dough stretchy.  It also makes for a disappointingly chewy pie crust.  The secret of a light flaky crust is to stop kneading the second you can press a portion of dough in your fist and it keeps its shape.

And you want the crust to be cold when it hits the hot oven.  This accomplishes two things.  The butter will melt all at once, and the steam that is produced will create little air pockets, which contributes to a flaky mouth-feel.  And there will be very little shrinkage, so the pie crust won’t retreat down the sides of the pie pan.

The kids rode around the neighborhood on my old pastry dough.

I have, in the distant past, produced pastry dough that was so overworked and tough the only thing it was good for was the sole of a tennis shoe or a pencil eraser.  So I can’t emphasize strongly enough how shocked and delighted I was the first time I made tender, flaky pie dough.

And I owe it all to my cooking crush Melissa.  I figured if it was her procedure, there’s no way I could fail.

Melissa D’Arabian, America’s kitchen sweetheart.

Thanks for your time.

Curds and why didn’t I know about this?

I didn’t even know this was a thing.

I was shopping online for The Kid’s birthday present, and I got distracted looking for this awesome pear/vanilla jam I bought from Whole Foods.  It was an intensely flavored spread that made me feel like my morning toast was actually a piece of birthday cake in disguise.

Unfortunately, they no longer carry it, and I never took note of the brand, which means I can’t look for it by name.  So, every once in a while I’ll fall down the Google rabbit hole for a few hours searching for something which may not even exist anymore.

During the hunt, I discovered that Dickinson’s, a Smucker’s-owned company that makes lemon and lime curds, also makes vanilla curd.

Vanilla Curd?!?  Stop and let that sink in a moment.  Vanilla.Curd.

And thus I discovered vanilla curd was a thing.  I decided to purchase some.

But here there be roadblocks.  #1-It’s not sold in any stores within a 50-mile radius.  #2-I can order it, but only by the case.  #3-The cases start at $30.00.  #4-Shipping for something I don’t even know if I’ll enjoy is an average of $12.87.

Look, I just bought a pair of sandals that I had to return because they gave me blisters, I can’t have two massive shopping fails in one week, my pride just won’t stand for it.  I took the shoes back to Marshalls, but I can’t return internet curd just because I don’t like it.

This thing might just work…

But then my search-engine-softened brain had a thought: Gee whiz, I can cook.  Maybe there’s some type of home machine that fits onto my lap and can connect to the whole wide world to find a recipe?

By gum, there is, and I found one (and then tweaked it some).

Debbie’s vanilla curd

curd ingredients

1 cup sugar

3 tablespoons cornstarch

2 vanilla beans, halved, split and scraped

1 cup water

Large pinch of salt

2 egg yolks, beaten

4 tablespoons cold butter, cut into pieces

2 teaspoons vanilla extract

In a medium pan, combine sugar, cornstarch, salt, and vanilla beans and caviar. Add water and cook over medium heat for 5 to 7 minutes, or until thickened.

In a small bowl, lightly beat egg yolks. Whisking constantly, very slowly pour about a cup of the hot sugar mixture into egg yolks; add egg yolk mixture back to hot sugar mixture, whisking to combine. Cook over medium heat for 4 minutes, or until thickened.

Remove from heat.  Discard vanilla beans; whisk butter into hot curd. Stir in vanilla extract. Let cool; spoon curd into airtight container and store in refrigerator for up to 2 weeks.

vanilla curd

The finished curd, becoming acquainted in my fridge.

This stuff tastes like vanilla did when you were a kid, and your taste buds were new.  Think drinking milkshakes in the back seat or Hunt’s Snack Pack with the metal pull-off lid that all the grown-ups said would cut your tongue when you licked it (but it never did).  It tastes like what vanilla smells like.  It tastes like warm happiness.

The texture is like lemon curd or creamed honey.  It’s slow moving and very spreadable.

What to put it on?

Well, my spoon worked awesomely.  But seriously, I’d put in on cakes, or cookies.  You could drizzle it on ice cream or fruit, or stir it into some hot milk, with a dusting of nutmeg.

As for me, I had a schmear on my English muffin.

And totally felt like I was back in the lunchroom at Central Elementary.

Thanks for your time.

Orange you glad?

Consider for a moment, the carrot.

The humble carrot.

It is literally, one of the most down-to-earth veggies that we have.  You’d think that something so humble would do well no matter what type of above-ground procedures it endures.

And you would be wrong.

You know those baby carrots that they sell in the plastic sack?  Yeah, they aren’t actually baby anything.  They are regular carrots which are whittled down, and treated with chemicals.  Don’t go there.  Buy fresh and cut them yourself.  They’ll be about half the price as well.

I’m a big fan of IQF (individually quick frozen) produce.  As soon as they’re harvested, the vegetables are taken to a processing center very near the fields.  They are normally frozen within minutes.  So, unless you grow them in your own yard, it’s hard to get much fresher.  With peas and corn, the sugars start turning to starch as soon as they ae picked.  I almost never buy fresh peas, and only purchase corn in the summertime, from a farmer’s market.

Fresh is almost always best.

Not though, for our friend the carrot.  The hard flesh seems to turn spongy when frozen, and the texture of the cooked carrot becomes unpleasant.  I think the sugar and ice crystals really slice the carrots up and they become badly damaged.  It makes for a very unhappy eating experience.

We eat a lot of carrots, but it’s always from fresh.  My favorite cooking method is glazed.  It seems that no matter how many I make, there are never leftovers.

It’s a simple dish, so every component is important.  Each ingredient has a cheaper, faux version, but I urge you not to use them.  You’ll only use a bit of each item, so it’s not an expensive dish.

Chinese five-spice powder is an ingredient in my carrots.  I also use it in my holiday ham, and on sweet potatoes, among other things.  It’s a spice blend used in many Asian dishes.  If you eat much Chinese, you’ll recognize the aroma.

Traditionally, it’s a mixture of star anise, clove, Chinese cinnamon, Sichuan peppercorns, and fennel seed.  Simple, right?  Yeah, not so much.  I use is a brand called Dynasty.  I get it at Li Ming Asian Market (3400 Westgate Dr, Durham).  But, I’d picked up a jar of Spice Islands at Kroger once when I thought I was out.  I’d never even opened it, so one day when my mom was visiting, I told her about the carrots, and gave her the recipe.  To save her a hunt, I decided to give her my unopened bottle.  Then I looked at the ingredients.  First off, there was way more than five; secondly, the only thing I recognized was cinnamon.  And, the aroma was not right.  I tossed it, and gave her a bag with some from my Dynasty bottle.

glazed carrots

Everything you need.

Glazed carrots

2 pounds carrots, peeled and cut into similarly sized pieces

½ cup chicken stock

4 tablespoons butter

¼ cup pure maple syrup

¼ teaspoon Chinese 5-spice

Salt and pepper to taste

Put everything into a heavy skillet.  Cover and cook on medium until the carrots are crisp-tender.  Uncover and continue to cook until a thick, glazy sauce has formed. 

Serves four.

Hey, don’t get me wrong, I love making do, and saving cash.  But sometimes it’s not worth it.  What you save in money, you’ll lose in flavor and enjoyment.

So to save up for those cute boots, buy your meat on sale.  But don’t cheap out on the glazed carrots.

Please pass the discount tuna fish…

Thanks for your time.

Nuts to you

The long awaited successful batch of roasted garbanzo beans.

The long awaited successful batch of roasted garbanzo beans.

First, let me start by saying that I am cognizant of the fact that neither peanuts nor chick peas are nuts.

Both are legumes, but they possess a certain nutty quality.  And not just because they think Jaws 2 was the better than the original and sandals with socks are a good look.

Yeah…not so much.

The chickpeas were the toughest, taking the most tinkering.  I’d made them (badly) in the past and was not impressed.  I thought they were just another healthy food that folks had convinced themselves were tasty, so they would munch on them, and not the potato chips.

But when I finally got a batch in which most were correctly roasted, I understood.  They are uber-crunchy (Petey has never actually tried them, because to him, they sound “too” crunchy—not even sure what that is), and flavored with lots of lemon, garlic, and Puerto Rican spices.

The goal when cooking is to roast them until all the moisture is gone, but they aren’t burned.  Which isn’t as easy as you’d think.  I tried lots of different combinations of heat and time, re-baked ones that weren’t done, and tossed many that were blackened nuggets of despair.

Last week, I finally cracked the code.  They take two hours in the oven, but when they’re finished the entire batch is cooked to uniform doneness.

My recipe produces a citrusy, garlic-y result.  But please, flavor them any way you like.  Go Chinese with toasted sesame oil and five spice powder.  Do a spicy Southwest version with cayenne, paprika, and chili powder.  Or make them Jamaican with some jerk spice.  That’s why making your own is so darn satisfying; you’re the boss of your own chick peas.

Trial and error roasted garbanzos

1 15 ½ ounce can chick peas

1 tablespoon garlic oil

Juice of ½ lemon

2 teaspoons Goya bitter orange adobo

Preheat oven to 325.  Drain and rinse beans.  Put into sturdy, dark, 9 inch round, or square metal pan.  Drizzle on oil and juice, sprinkle on spice.  Roll around to evenly coat and put in single layer.  Bake 30 minutes, then remove from oven and roll around and toss.  Do this every 30 minutes for a total of 1 ½ hours.  Then give them one last jiggle, turn off oven and let sit inside, undisturbed, for 30 more minutes.  Makes 1 ½-2 cups.

When I worked for Bosco, we had a customer who was a caterer and each year at Christmas would bring us homemade Buckeyes.  For the uninitiated, they are delicious little peanut butter balls coated with chocolate.  They are to Reese’s cups what steak is to a Mickey D’s quarter pounder–they both come from a cow, but that’s where the similarity ends.

I often give these as gifts.  I make up the balls, and then freeze.  When I need some, I just coat them with the chocolate, without even thawing them.  Use a toothpick to dunk them, then smooth out the little hole you’ve made.  The wax keeps the chocolate glossy, but you won’t taste it.

Buckeyes

5 ½ cups confectioner’s sugar, sifted

1 c. peanut butter

1/2 lb. (2 sticks) butter, softened

1 teaspoon salt

Caviar from 1 vanilla bean

½ bag semi-sweet chocolate chips

½ bag milk chocolate chips

About 1/3 cup canning paraffin wax, finely chopped

Blend butter, peanut butter and vanilla. Add sugar and beat to dough-like consistency. Form into balls with small scoop and chill or freeze. Melt chocolates and wax in microwave on 20 second intervals, stirring after each, until almost fully melted.  Then stir until completely smooth. Double-dip balls in chocolate, leaving circle of peanut butter showing.  Makes about 6 dozen.

My last recipe is crazy-simple.  But you won’t be able to keep your hands out of these pecans.

Obsessive-compulsive Pecans

Melt 2 tablespoons of butter in skillet on medium.  Add 2 cups whole, shelled pecans.  Salt and pepper to taste.  Stir constantly until they’re lightly browned and smell nutty.  Drain on paper towels.

So here you have it.  Three recipes that are perfect to put out for visitors, or give as gifts.

And, if somebody tells you to go nuts, you can say, “Don’t mind if I do.”

Thanks for your time.

“I was Debbie Ross…”

debbie eighties

Believe it or not, this was considered fashionable, and sexy in the eighties…and all of that hair is mine.

Originally published in the Herald Sun 11/28/2012

In our minds, I and my best friends Rhiannon and Bo, ran the high school and owned the whole of Elizabeth City when we were seniors.

We all had cars and boyfriends (my car was a 1971 Dodge Dart Swinger named Lancelot, and my boyfriend was a stone cold fox named Petey), at 18 we could legally buy beer, we had jobs, so we had a little jingle in our jeans, and we had enough (ati)‘tude to light up Time’s Square.

And it all seems like yesterday.

But yesterday was actually my thirtieth-class reunion. Petey and I got back home a few hours ago.  It was all kinds of fun.

Friday night we donned NHS reunion t-shirts and went to see Northeastern play football.  We stomped First Flight High from Kill Devil Hills 47-7.

Which is kind of amazing, because I’m not sure the Eagles won one game the entire time I was a student there.

Saturday we had an old-fashioned pig pickin’ wonderfully prepared by our uber-talented ‘cue cook and classmate, Frank Lilly Jr.

Eastern NC BBQ is different from other food. It’s something that is only made well by a very few. It’s not a recipe or a ‘dish’.  It is pork slowly basted in mystery, and the past.  Luckily for the class of ‘82, Frank is one of the anointed ones.

Barbecue is never to be attempted by dilettantes and amateurs.

I got crazy sunburned.  Petey, wise man that he is, wore a hat and got into the shade occasionally.   He has a healthy glow–I look like I was staked out in the desert.

Saturday night was the dinner-dance.

There was a catered dinner, a DJ, and a photographer.  Everybody was all dressed up and looking swell.  It was prom for the Spanxx and bald spot set.

Nobody wanted it to end.

When traveling, we don’t like imposing on friends and family.  The visit is happier when all parties can retreat to privacy.

But I don’t like to stay in chain motels.  They all look alike, and usually smell funny.

And Petey doesn’t like Bed and Breakfasts.  He’s very quiet and nest-y, and it makes him feel uncomfortably like a house guest in a stranger’s home.

My conundrum was that is the bulk of the options in town.

The last time I visited E City, Bo showed me where they held the cast party for her local theater production.

It was a beautiful brick Georgian house on Main St, just a short walk from downtown; the Culpepper Inn (609 W Main St, E City).  In addition to hosting parties, it was also a B&B.

When it came time to make a decision about where to stay, I thought about the inn, but I didn’t think Petey would be up for it.  Just in case, I pulled up the website.

The Culpepper Inn. A very elegant home away from home.

Yes, it was a dreaded B&B, but with a neat twist.  They had the most adorable suite upstairs in the carriage house.  It was a separate building, with outside access, and total privacy.  The flat also contains a shower so big you could play half-court b-ball in it.  That’s my idea of nirvana (the shower, not the b-ball).

It’s a charmingly decorated studio apartment with the amenities of a stately, well-appointed residence.  And it comes with a three-course breakfast.

I made reservations.

Holly Koerber, and her lovely daughter Melanie were our hosts, and by the time we left, friends.

The best meal we ate all weekend was at their table, this morning.

Holly’s philosophy is astonishingly Durham-like.  The inn is run in a very environmentally responsible manner.

But it’s her cooking that truly resembles the Bull City.

As much as possible, the food is organic and locally sourced.  I ate some fantastic bacon that they get from a farm in Windsor (a teeny tiny town about 50 miles from E City).  The pumpkin came from a nearby field.  Local honey.  Everything was fresh, and simply, honestly prepared so that the ingredients shined.  Outside our own carriage house door was growing a healthy gaggle of heavenly smelling tomato plants, heavy with luminous jade orbs.

This morning, we had scrambled eggs, the aforementioned yummy bacon, baked cheesy grits, and a pumpkin French toast casserole, along with vibrant fresh fruit.

I thought about that bounty on the 3 ½ hour ride to Durham.  And also about the beauty of that historic home and all of our experiences in town this weekend; how they were truly an illustration of the very best things about Elizabeth City.

As soon as we got back, I called Holly and asked for a recipe.  I was hoping I could beg her for one, but almost before I finished asking, she kindly offered both recipes, the grits and the casserole.

Here they are, in her own words:

Cheese Grits:

Cook ½ cup yellow grits in 2 cups of boiling water with ½ tsp. of salt & ground pepper on low for 5-6 minutes.  Add ¼ cup real butter, 1 cup shredded cheese (any kind you prefer, I like smoked Gouda), and finally, 1 beaten egg.  Put in individual baking dishes and bake at 325 degrees for 25 minutes.  Brush top with more butter and serve.

Pumpkin Bread Breakfast Casserole

5 slices of any bread, cubed. (Inexpensive white bread puffs the nicest!)

1 cup pumpkin puree (canned or fresh)

1/3 cup sugar

1 tsp. pumpkin pie spice

1/2 tsp. cinnamon

1 tsp. vanilla

Pinch salt

3 eggs, beaten

½ cup milk

3oz evap. milk

½ cup chopped pecans

Grease 8X8 casserole. Add cubed bread.  Blend pumpkin, spices, vanilla, salt, eggs, both milks and pour over bread. Top with pecans. Cover with plastic and refrigerate overnight.

Bake uncovered at 350 degrees about 45 minutes until a toothpick in the center comes out clean.  You may serve this with vanilla yogurt on the side.

It was kind of disconcerting seeing all my old classmates this weekend.  In my head they were a bunch of eighteen-year-old kids getting ready to take on the world.  But the folks that showed up looked like the parents of those kids.

Until I looked into their eyes.  And then I recognized those nutty guys from NHS class of ’82 (Of course, Rhi, Bo, and I all still look like teenagers).

Go Eagles!

*Coming soon:  One of my most beloved friends from NHS, Paxton, lives here in Durham.  It was revealed this weekend that the heathen doesn’t like Mexican food.  His partner Alex and I are taking him to Chubby’s for a conversion attempt.

I will spill on our adventures in a future column.

Thanks for your time.

A Kernel of Truth

Originally published in the Herald-Sun 12/19/2012.

At our house, we are huge fans of carby comfort food.

We have a repertoire of dishes, everything from blue box mac, to an invented dish we call a ‘pasta toss’ (pasta, usually with sautéed veg and lots of lemon and garlic).

When Petey is saving lives at Duke, my baby and I dine alone.  On those nights we love nothing better than to get into our jimmies, and hop onto the couch with a couple of plates of steamy noodle goodness.  Then we dine, while watching a cinematic classic like, “Super Lobster Versus Mega Kitten”.

One night, prowling the Food Network website, I came upon a picture of a pasta dish with corn and green onions.

It looked fresh and light, yet luxurious.  Crazy gorgeous.  It made my stomach rumble.

I copy/pasted the illustration, and emailed it to The Kid, who was ensconced upstairs in the fortress of solitude, with various beeping and blinking devices.

It was given a thumb’s up.  We decided to create our own corn and pasta dish.

We immediately started making plans.

For pasta, we decided on parpadelle.  It’s as long as spaghetti, but as wide as an egg noodle.  The good stuff is as silky as a French nightgown.  It’s eggy and yummy.

For flavoring and fat in which to saute, we decided to go with pancetta.  It’s Italian.  They make it with pork belly, which also makes our American bacon.  It’s cured and rolled. But unlike bacon, which is smoked, pancetta is never smoked, but flavored with peppercorns and other herbs and spices, like rosemary and juniper berries.

Although I am an onion lover, my child is not, so instead of green onions for our dish, we would stir in a handful of fresh chopped parsley.  This would give us both color and fresh bright flavor.

As for our star of the show, corn, a trip to the farmers’ market presented us with a myriad of choices.  We settled on some beautiful sweet juicy ears still in their pale green silky robes.

Some stuff about fresh corn:

As soon as the ear leaves the stalk, the sugars in those sweet kernels start converting to starch.  In two days, about 80% of the sugar has mutated.  So, only buy fresh corn on the day you will use it.  And don’t buy it if it’s been languishing at the grocery store for days. The way to get the tastiest corn is to get freshly picked.

Otherwise, buy frozen.

Don’t be ashamed to be seen in the freezer aisle.  IQF, or individually quick frozen vegetables is the way most veg are prepared these days.  They’re cleaned and frozen as quickly as possible, sometimes within minutes, in buildings just feet from the fields in which they grew.  I promise they will be fresher than the sad, middle-aged specimens declining in your supermarket veggy department.

To shuck corn, quicker and cleaner; drop each ear into boiling water for a count of fifteen.  This will make the silk practically jump off the corn.  To completely eliminate the mess and bother, make the kids do it–outside.

To get the kernels off the cob, just hold the cob upright on a cutting board, and cut down with a sharp knife, turn it, and repeat.  After kernels are removed, scrape down the cob with the back of your knife, to get the juice.

Some folks swear by resting the cob on the opening of an upright bundt pan.  The theory is all the stuff goes only into the pan.  It never works for me.  It is a messy job, no getting around it.  I suggest a drop cloth, and a shower after.

Once we had our components, we set about making our newest pasta toss.  It was a blast conspiring together to create this new recipe.

Happily, all the fevered intrigue paid off.  It’s the perfect, yummy plate to devour while watching “Grizzlygator versus Colossal Hedgehog 2”.  This time I hear it’s personal.

Summer Corn & Parpadelle

Serves four as a side dish, or two as a main.

1 lb parpadelle

¼ lb thick sliced pancetta, cut into cubes

2 cloves garlic, peeled, and smashed, or thickly sliced

6 ears fresh corn, cut from cob (or 12-16 ounces frozen shoe peg, if fresh is not available)

1 shallot, diced

1/3 cup white wine

1 cup chicken stock

½ cup grated parmesan cheese

2 T butter

1/3 cup chopped fresh flat-leaf parsley

Salt and pepper

Set a very large pot with heavily salted water on to boil.  When it boils, add pasta and cook ‘til al dente. 

In a large heavy skillet, cook pancetta until completely browned on medium-low, and remove from pan. Turn up to medium, and put garlic in.  Cook until lightly golden and fragrant.  Remove and discard. 

Put shallots into skillet, and cook until softened and lightly translucent.  Add corn with juice.  Cook until the liquid is almost gone, and add wine, and stir to coat everything.  When wine has evaporated, add chicken stock, and turn up to medium-high. 

Let it bubble away to thicken, while paprpadelle is cooking.  When the consistency is right, turn off heat, and stir in cheese and butter (called mounting).

When the noodles are done, don’t strain them, remove from water with tongs or a large slotted spoon, and add directly to sauce.  Add parsley, and toss everything together.  If the sauce is too stiff, add a little pasta water to thin it.

Check for seasoning, plate, scatter top with pancetta bits, and serve. 

The Kid called this past weekend, and told me next week’ll be finals for food and wine compatibility class.  The directive is a dish that pairs well with a chardonnay.

Guess what recipe my child is choosing to make for the exam?

Thanks for your time.